
QQ Assistant
| Item | Details |
|---|---|
| Best for | Saving text, voice, images, files, and links to OmniBox or asking questions from QQ |
| Current limits | One QQ account per binding; only the first message received within 3 seconds is processed; reply URLs may appear as [URL] |
Try asking OmniBox some questions!
Connect your QQ Assistant to easily save information, store it in your knowledge base with one click, and enable Q&A within QQ.
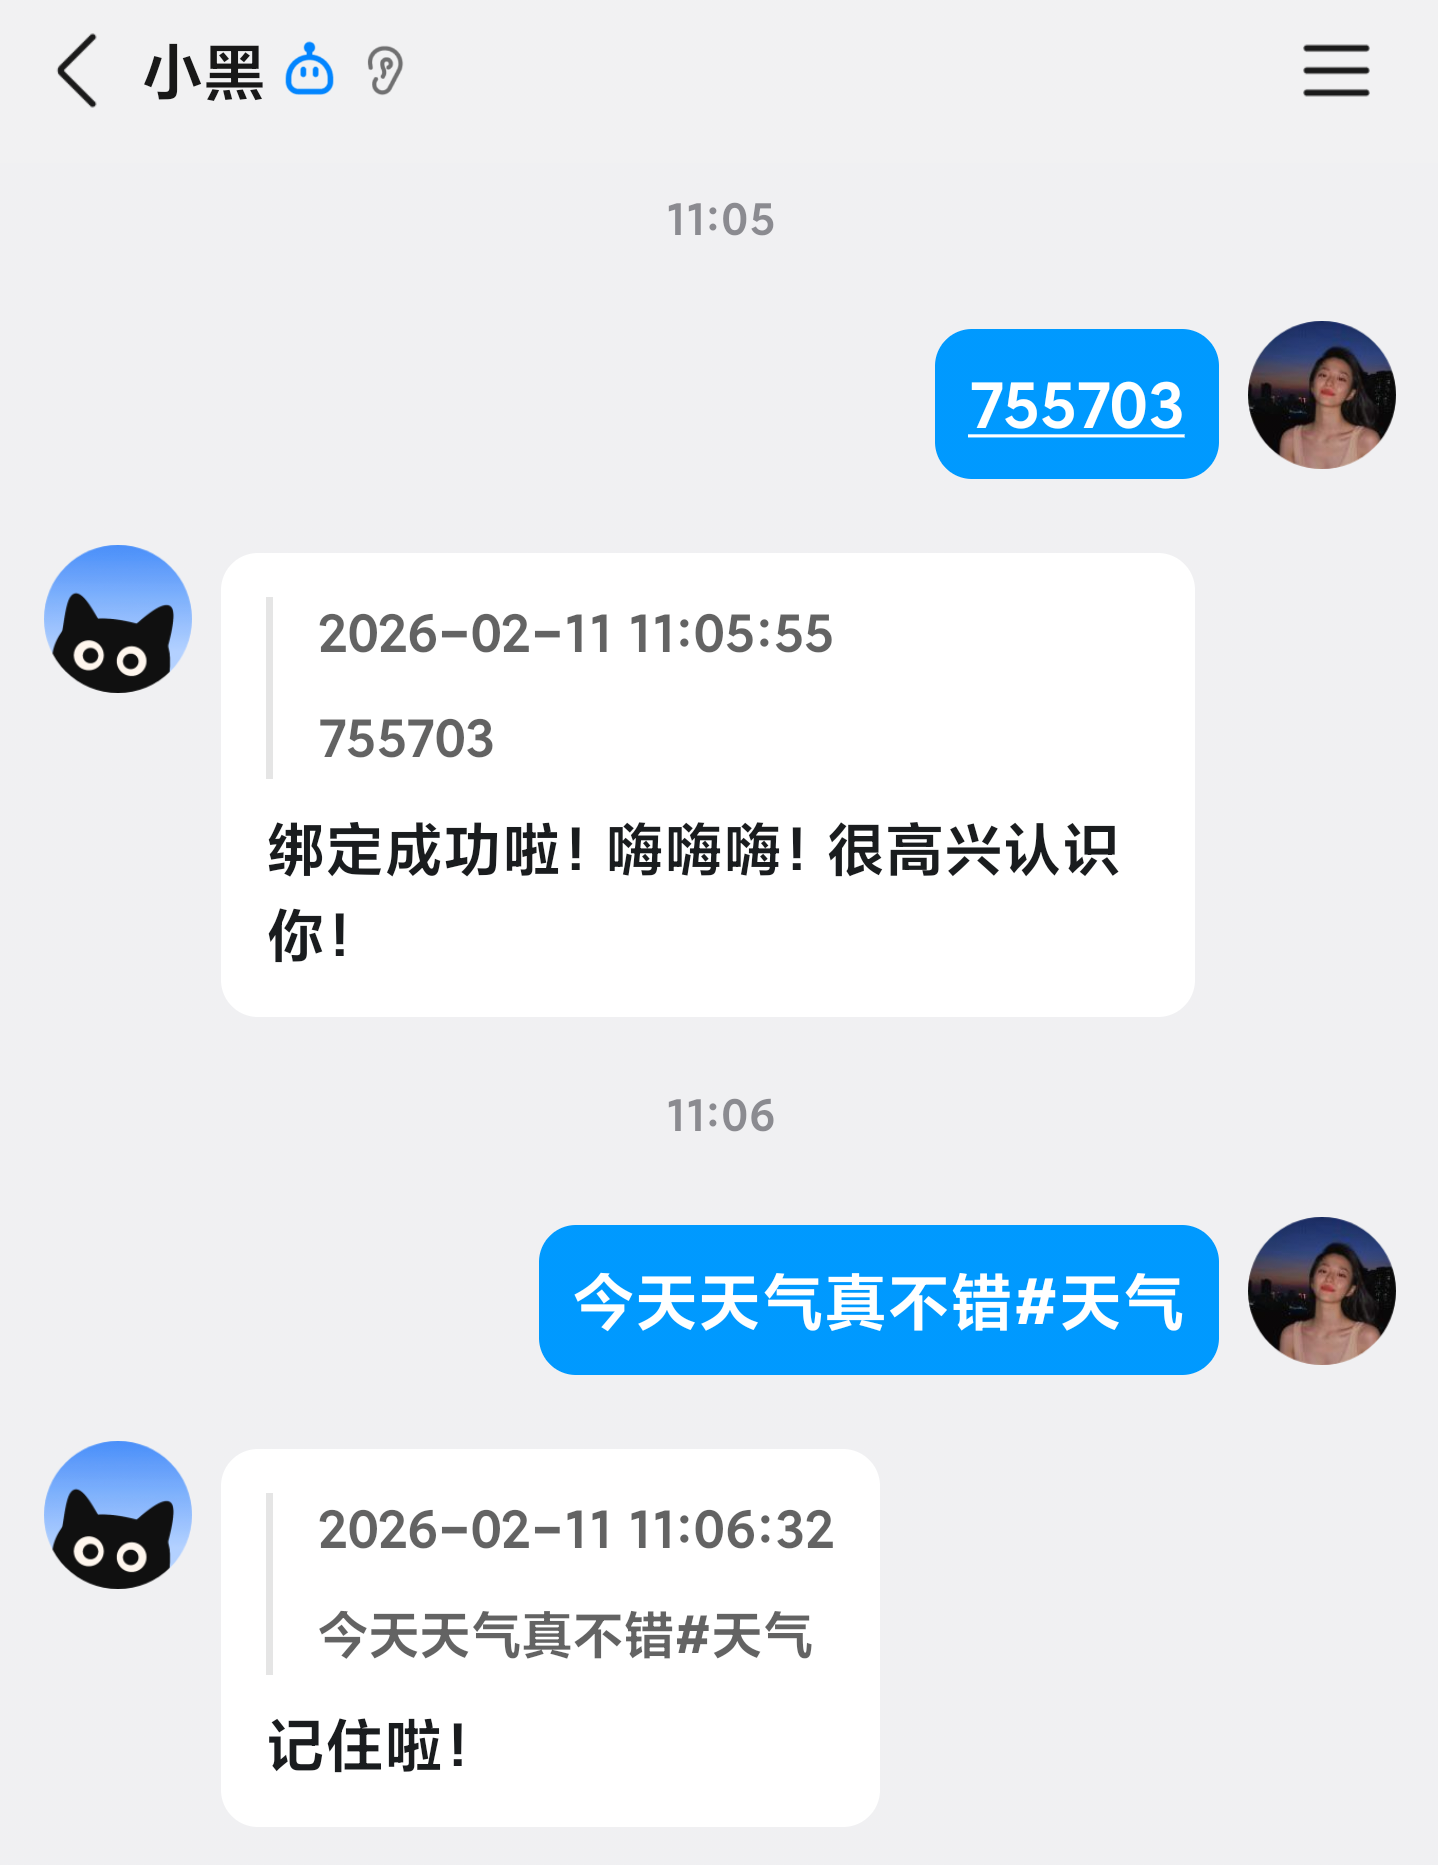
Binding
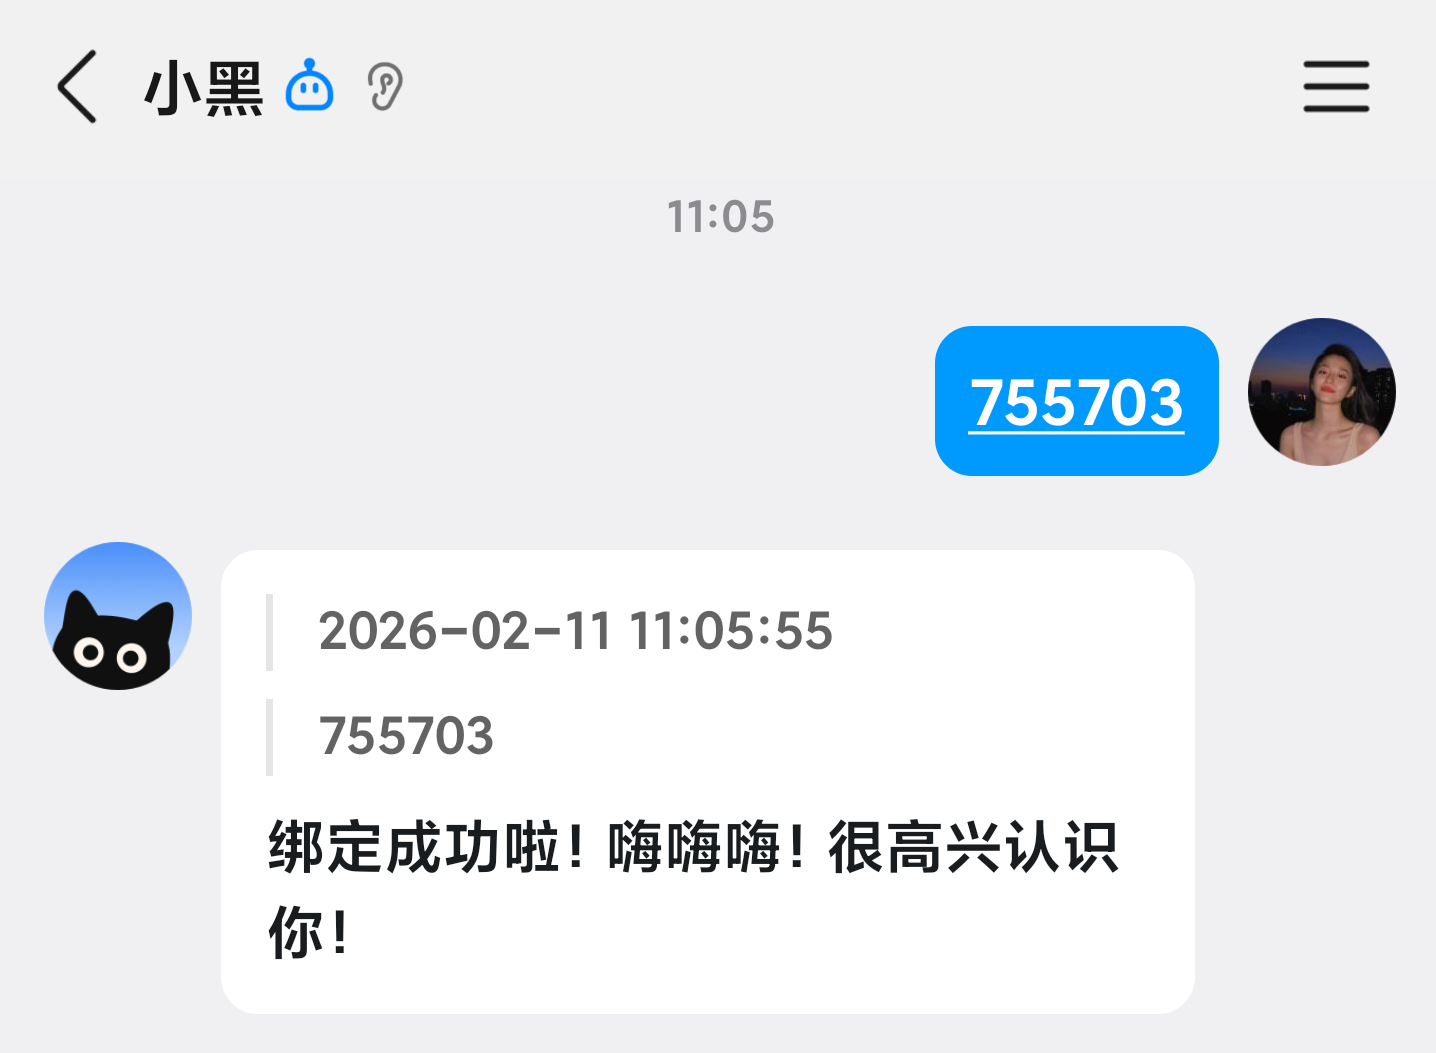
- You will receive a reply when entering the verification code for binding. You can also check your OmniBox to verify if the binding was successful
- By binding the QQ Assistant, you agree to the Terms of Service and Privacy Policy
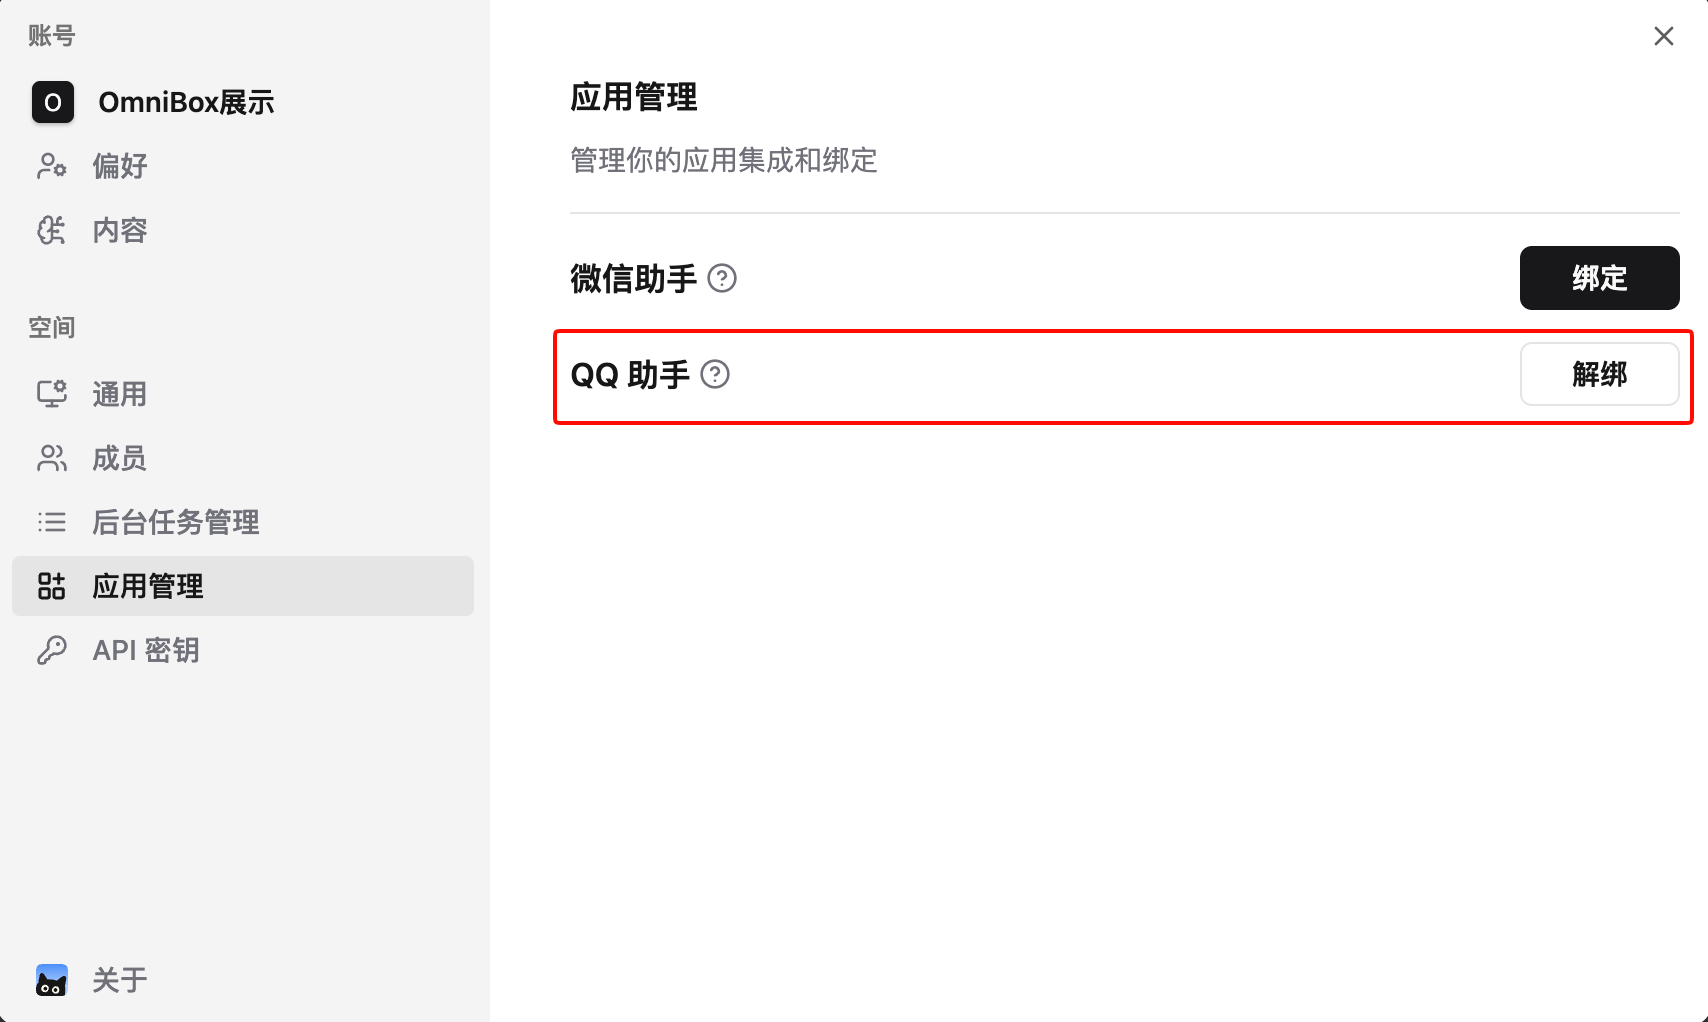
- Log in to OmniBox, click
Settingsin the top left corner, selectApp Management, and bind QQ Assistant
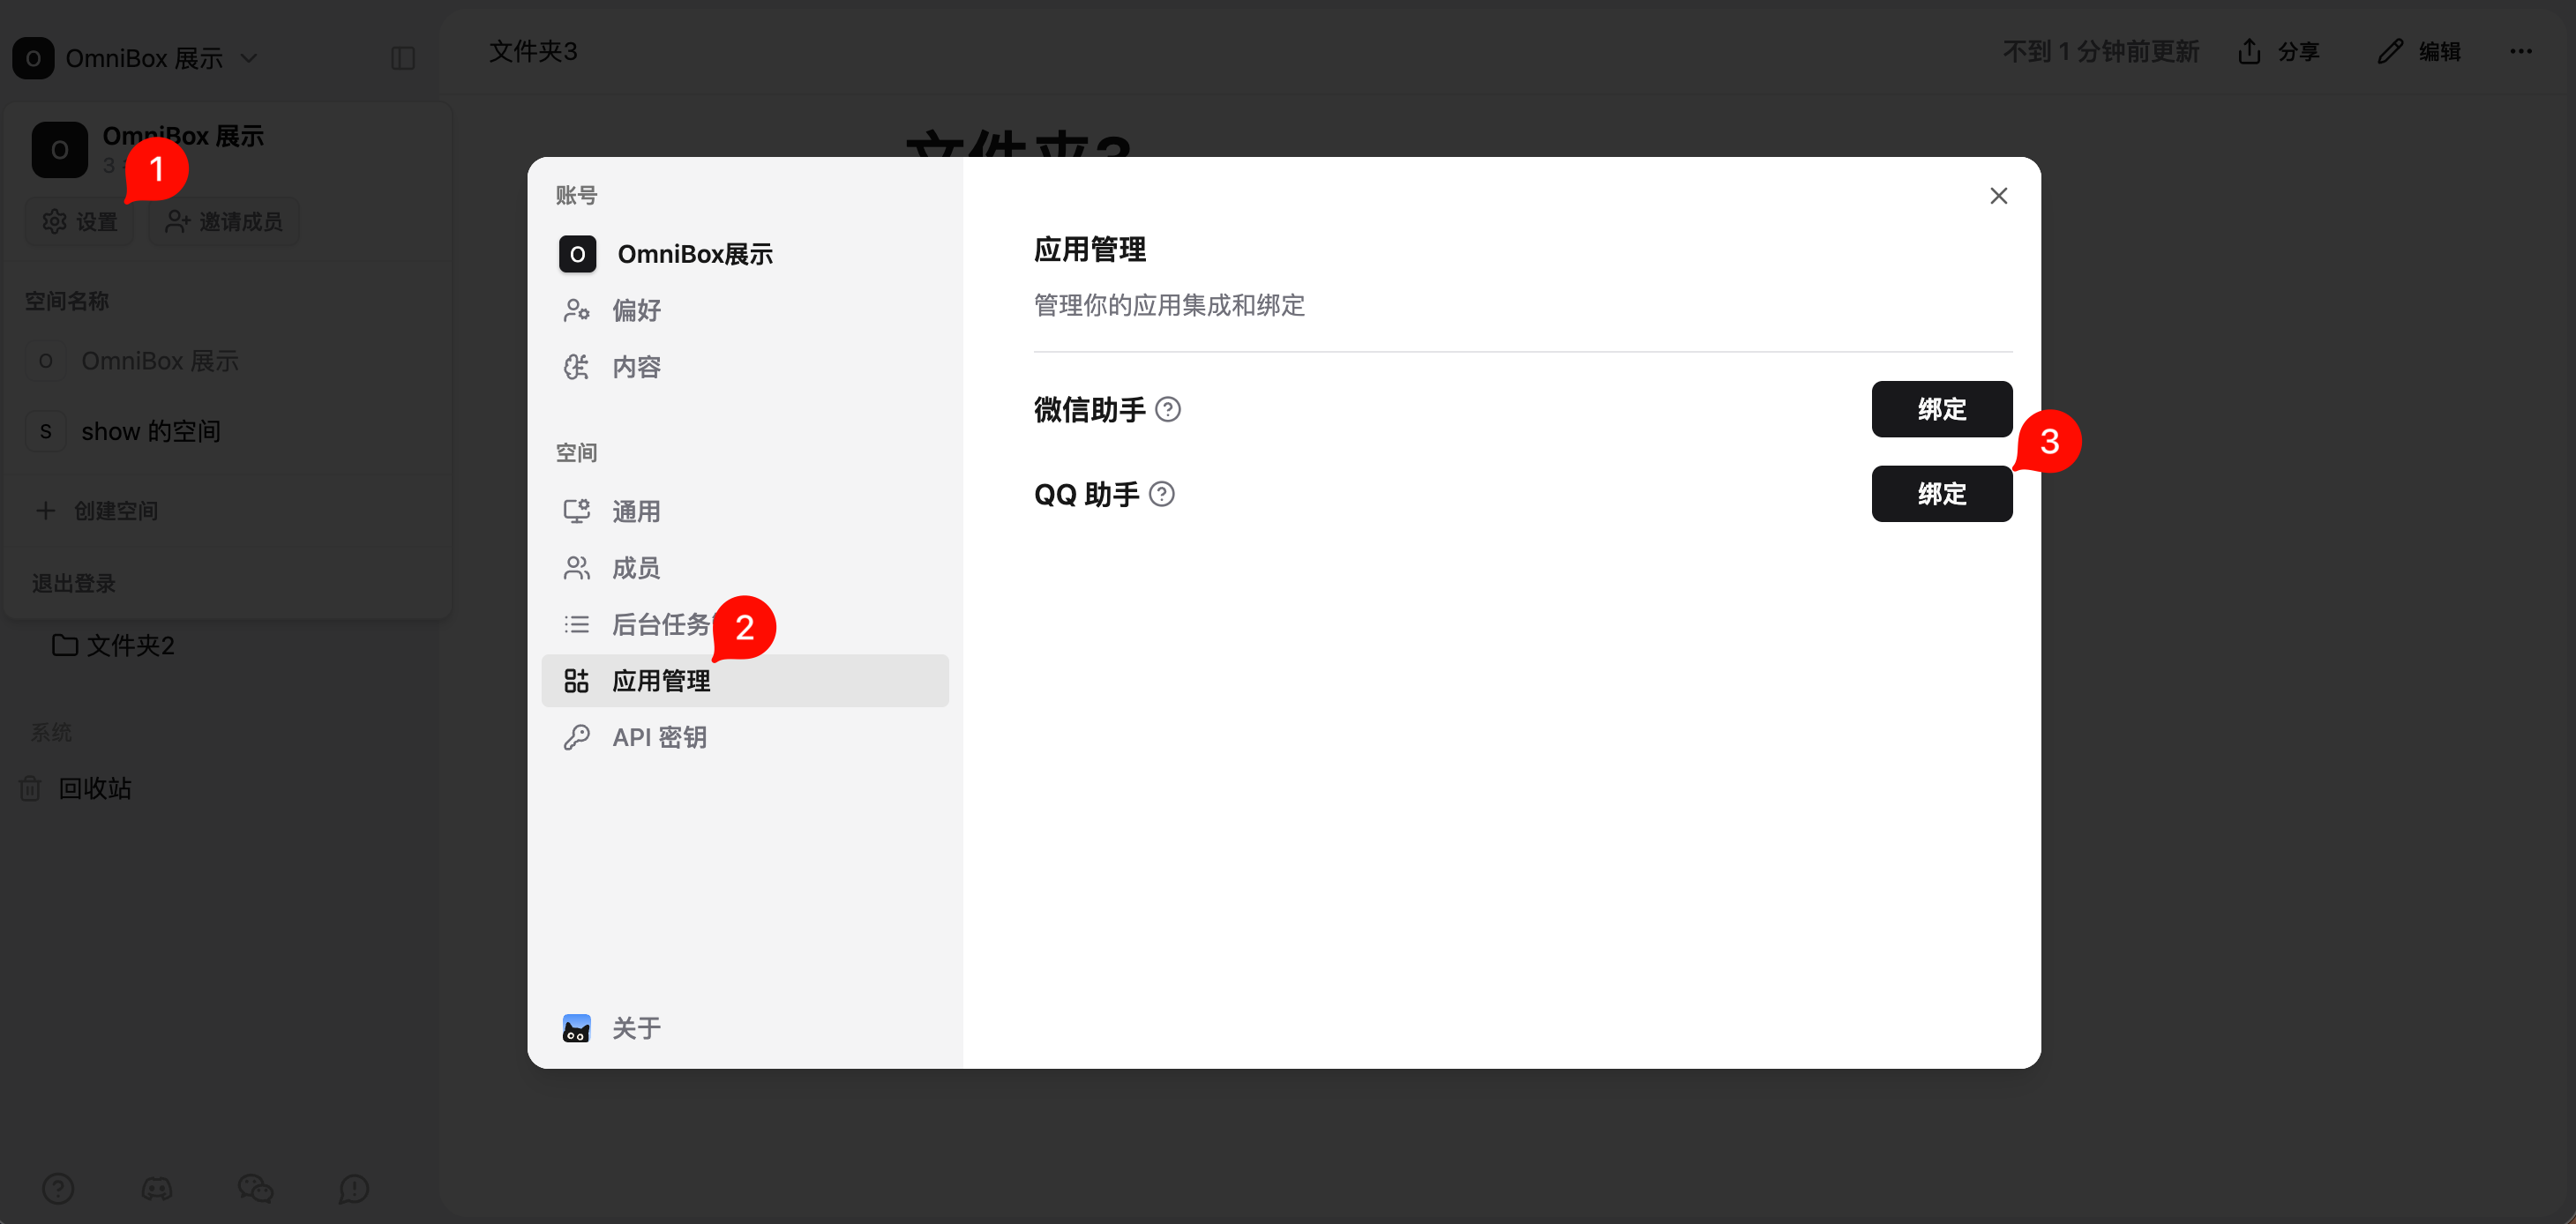
- Click
Bindand follow the prompts to bind QQ Assistant
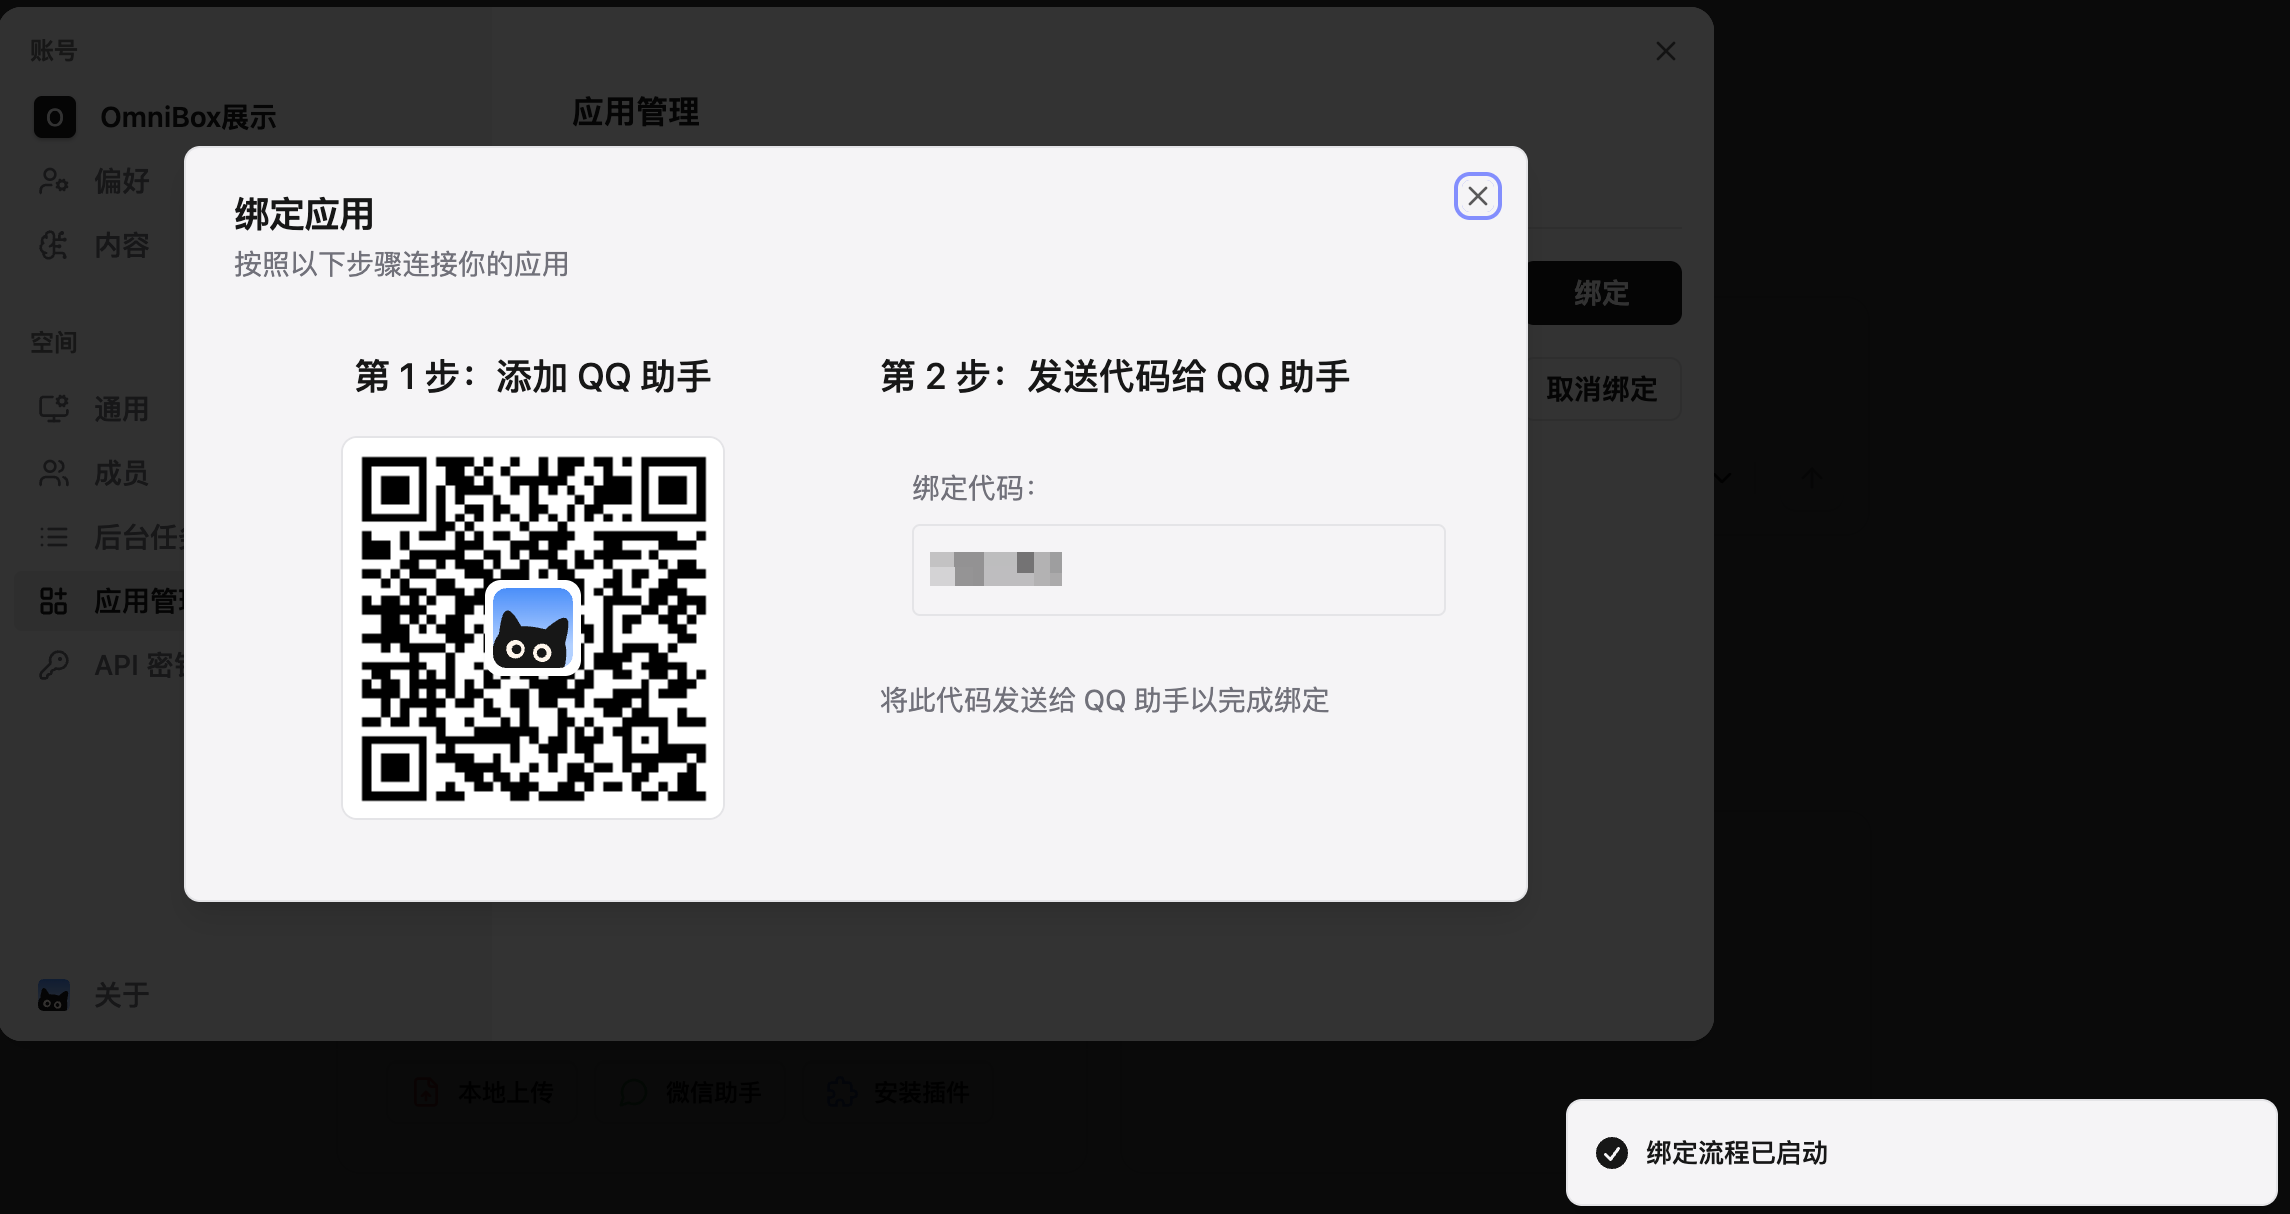
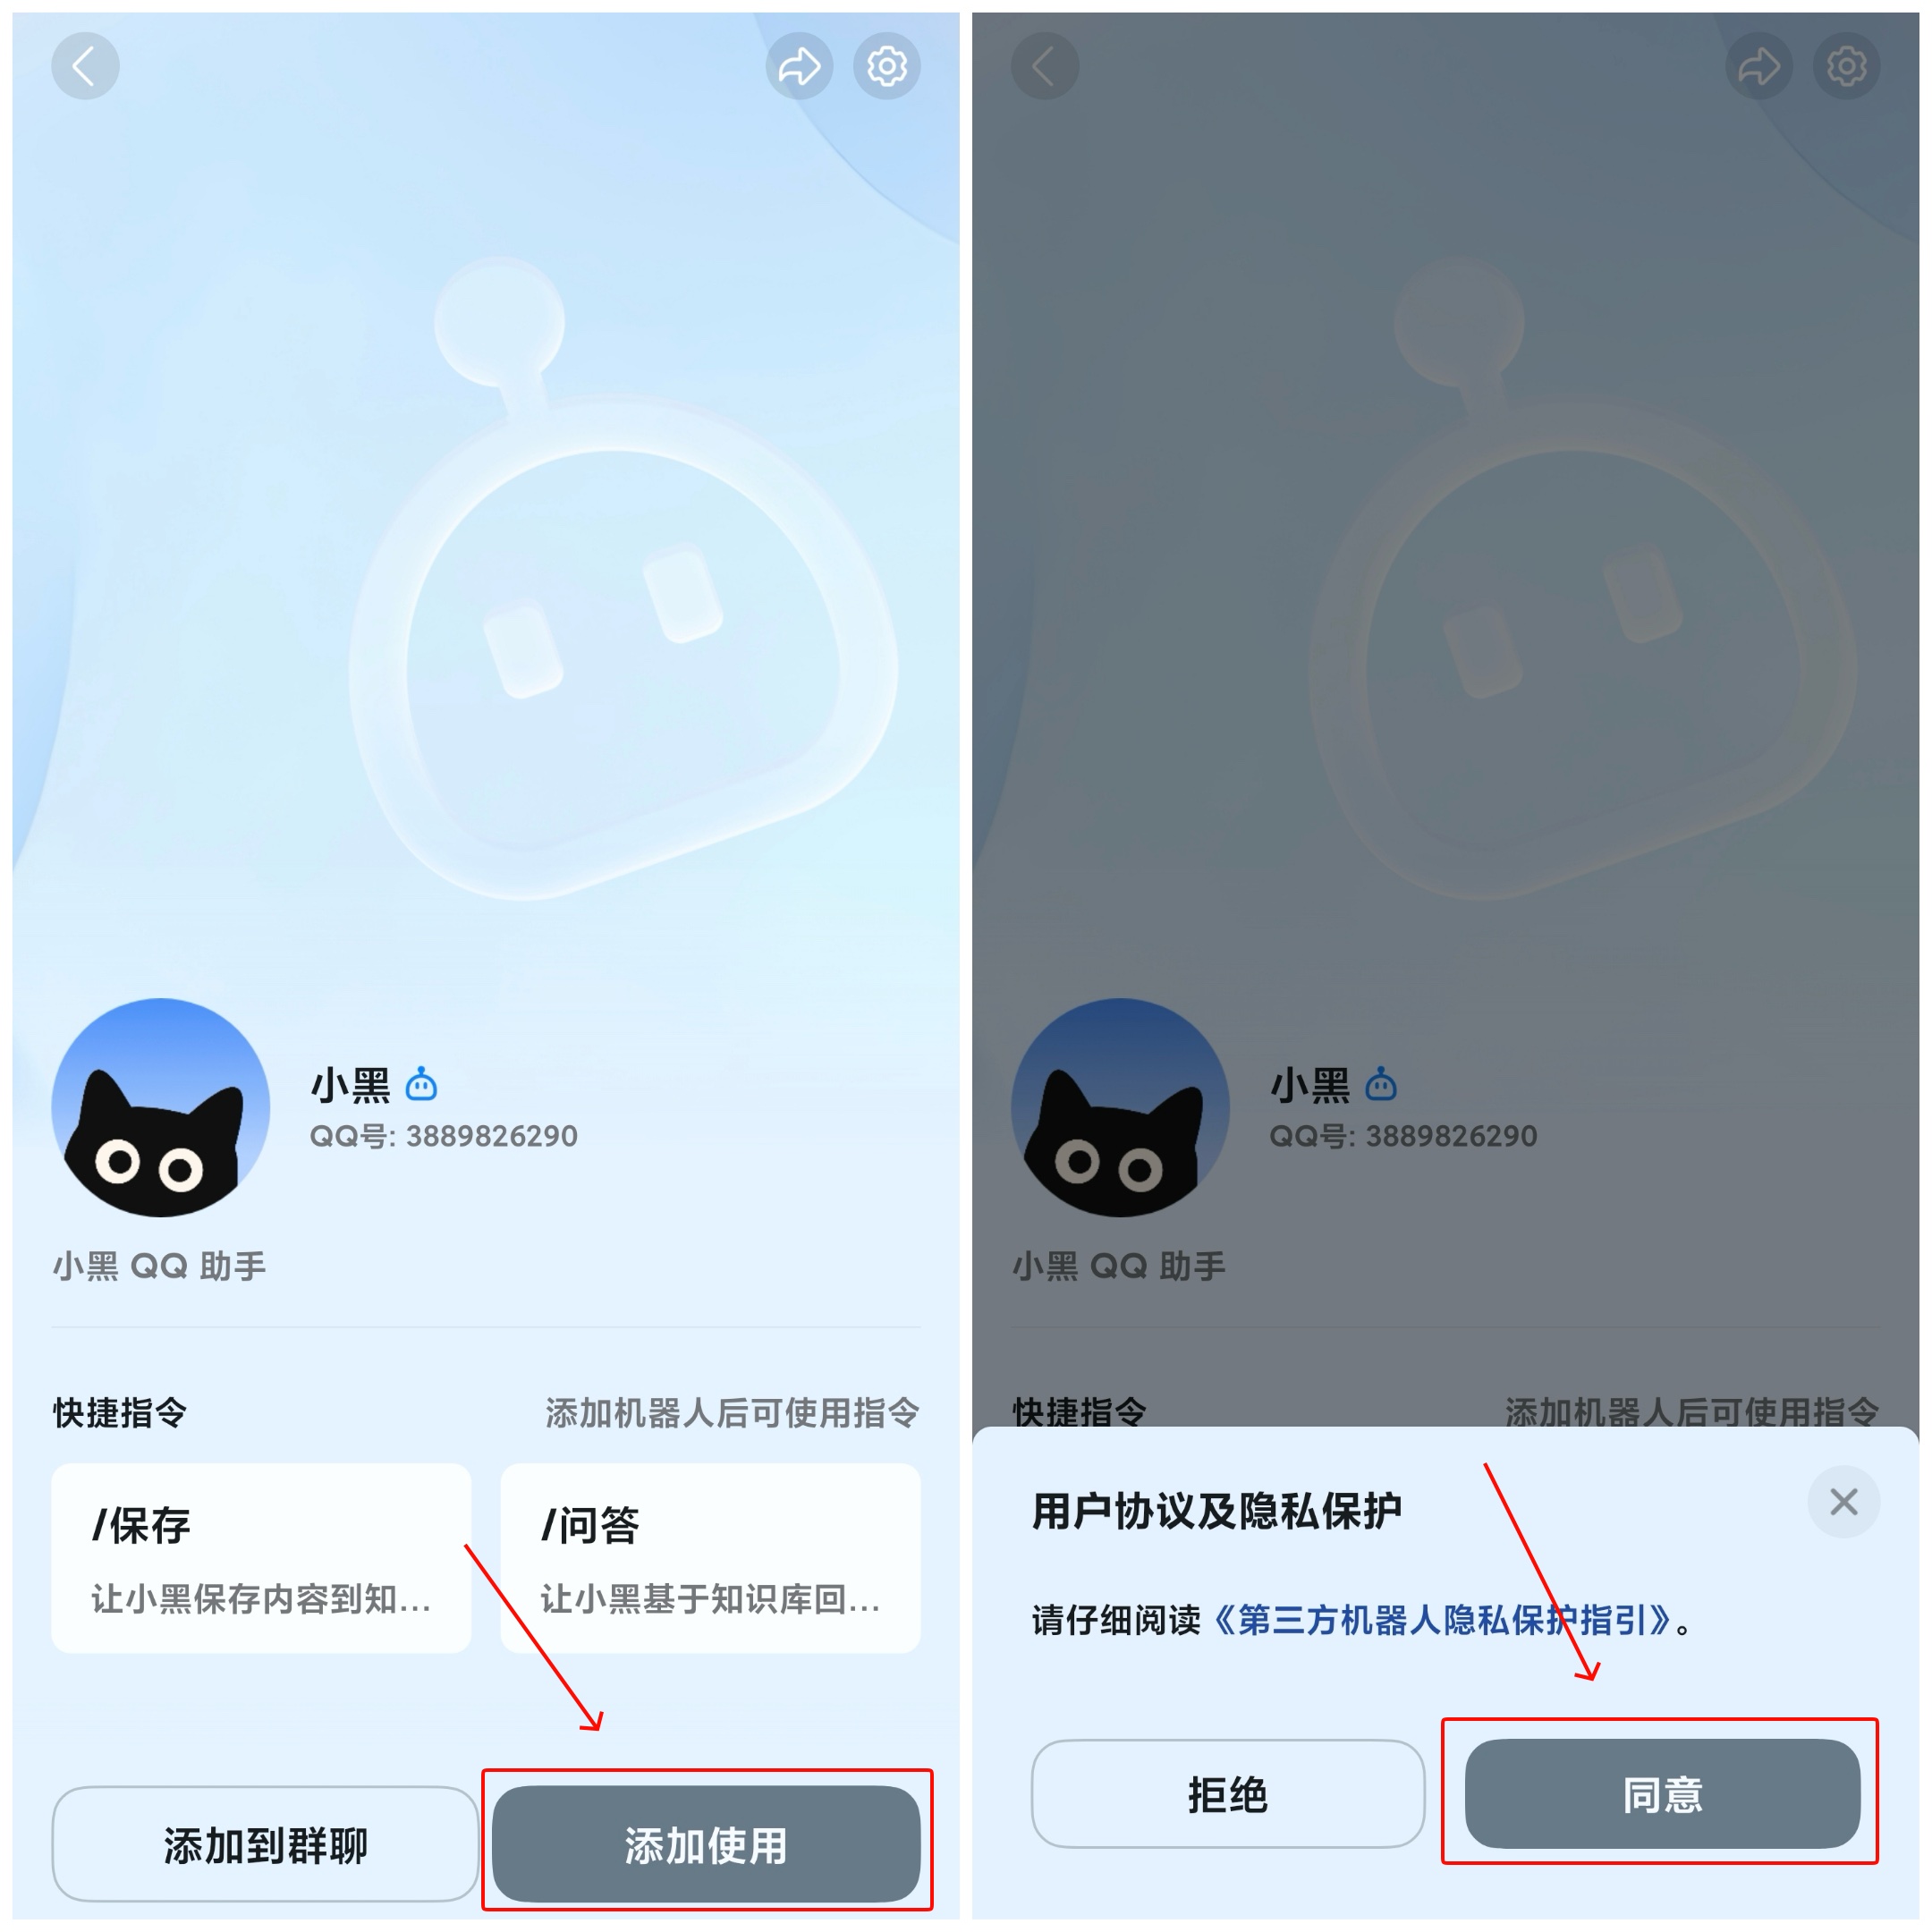
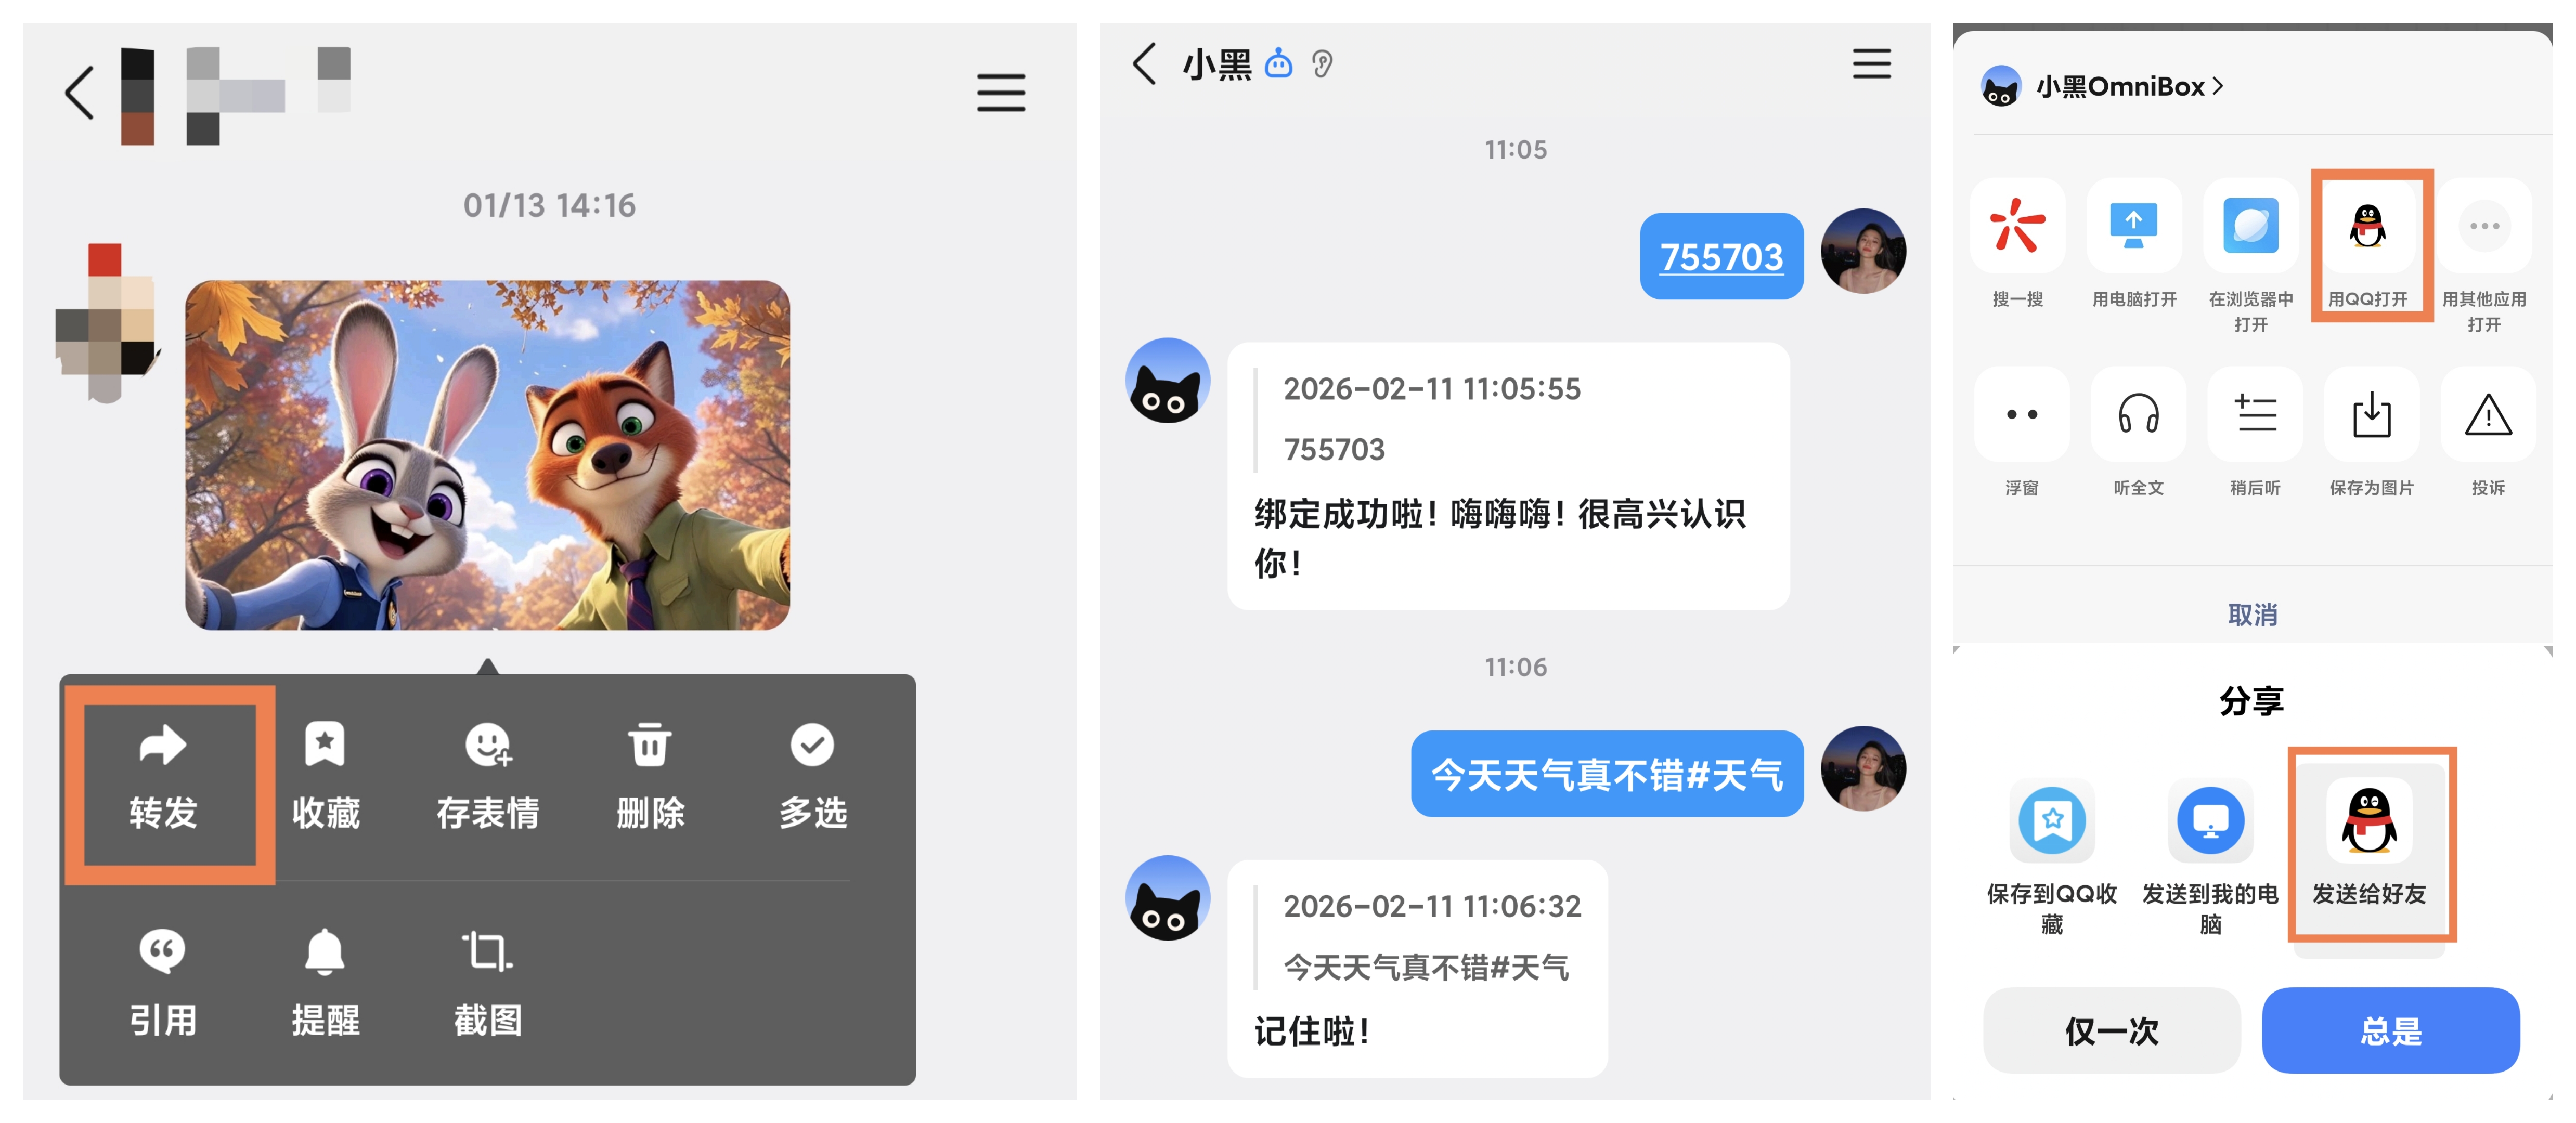
- Scan the QQ Assistant QR code, click
Add, and clickAgreeto the user agreement and privacy policy to complete the addition
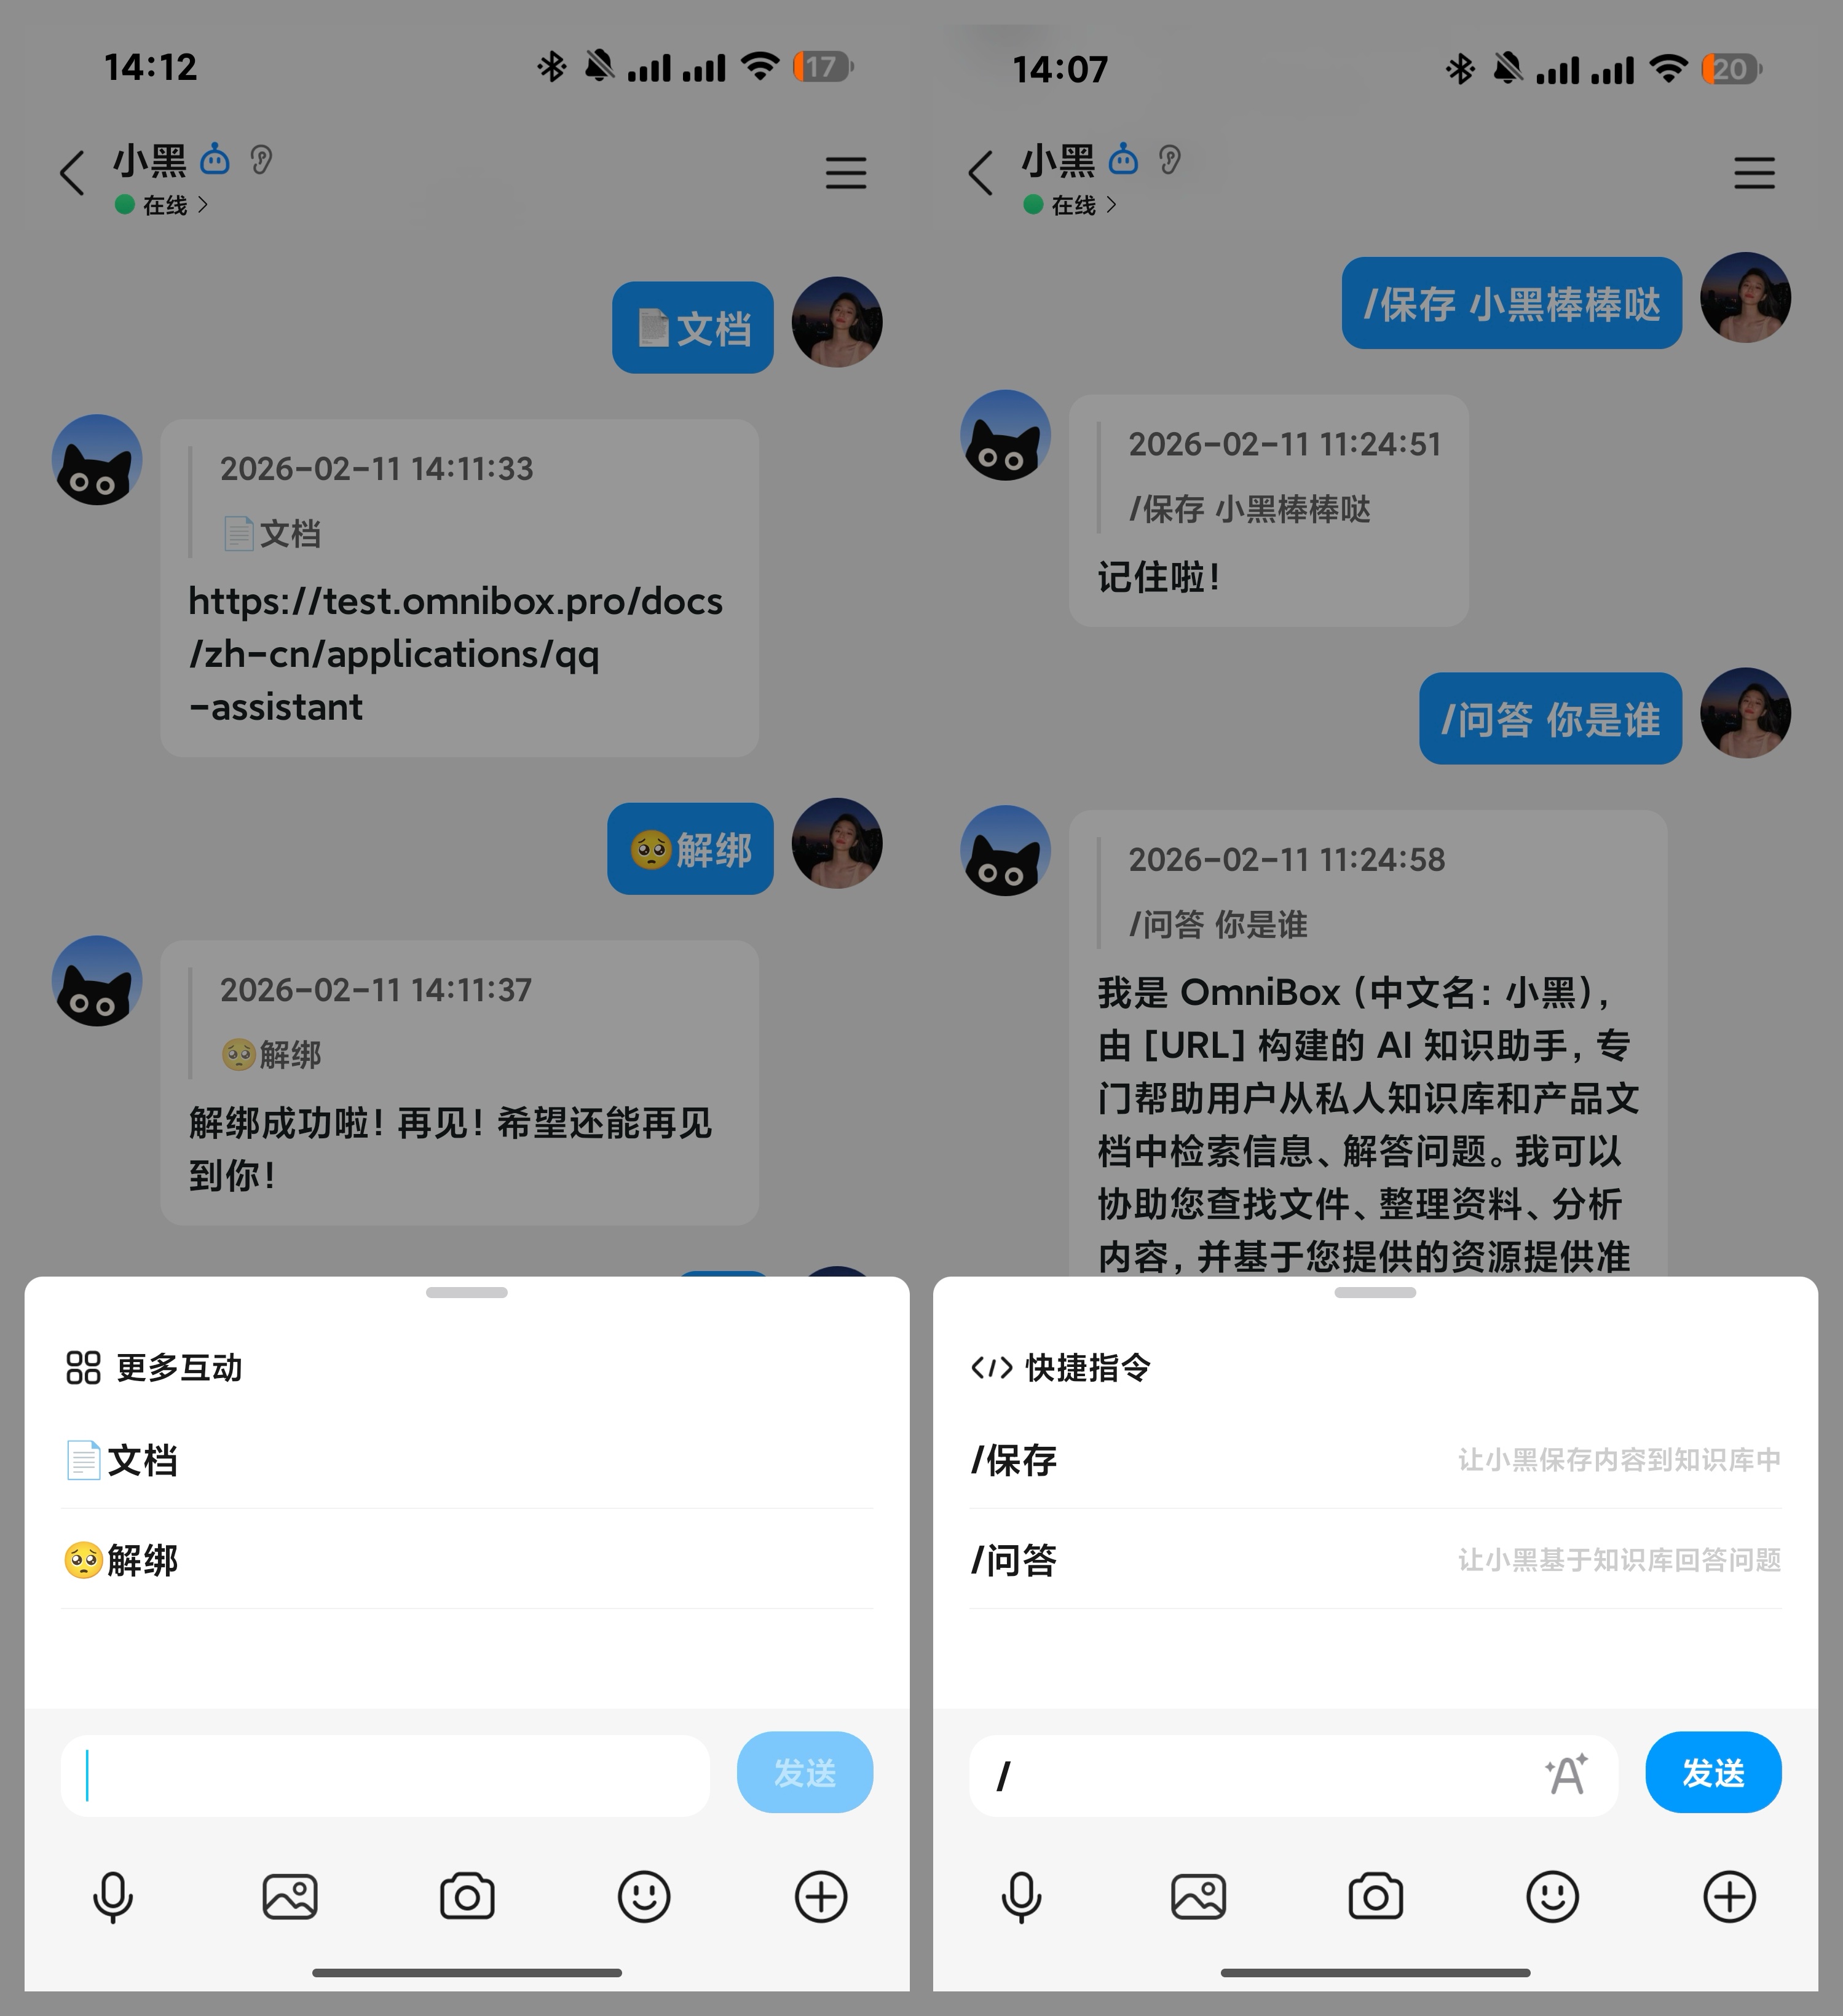
- QQ Assistant binding successful
Supported Message Types
Currently Supported
- Text (save text)
- Text (Q&A)
- Web links / cards
- ⚠️ For card-type content, please share directly from the original app to QQ Assistant. Cards forwarded from chat windows cannot be parsed
- Voice messages
- Images
- Files (see supported file types: Upload Files)
Not Supported
- Merged forwarded messages
- Mini Programs
- Contact cards
- Stickers
- Red packets
- Location
Save Content
To ensure service stability and user experience, we have added message processing rate limits. For each user, the system will only process the 1st message received within 3 seconds
- Send content to
OmniBoxin QQ to save it. Supports direct forwarding, manual input, or local upload. - Saved content will be stored in your Personal resource list by default
- After saving, QQ Assistant will reply with a confirmation. The saved content will appear in your OmniBox after a short while
Specify Save Location
Specify Namespace
Currently, QQ Assistant is bound to a namespace. If you want to save information to a different namespace, you need to unbind from the original namespace and rebind to the new namespace.
Specify Folder
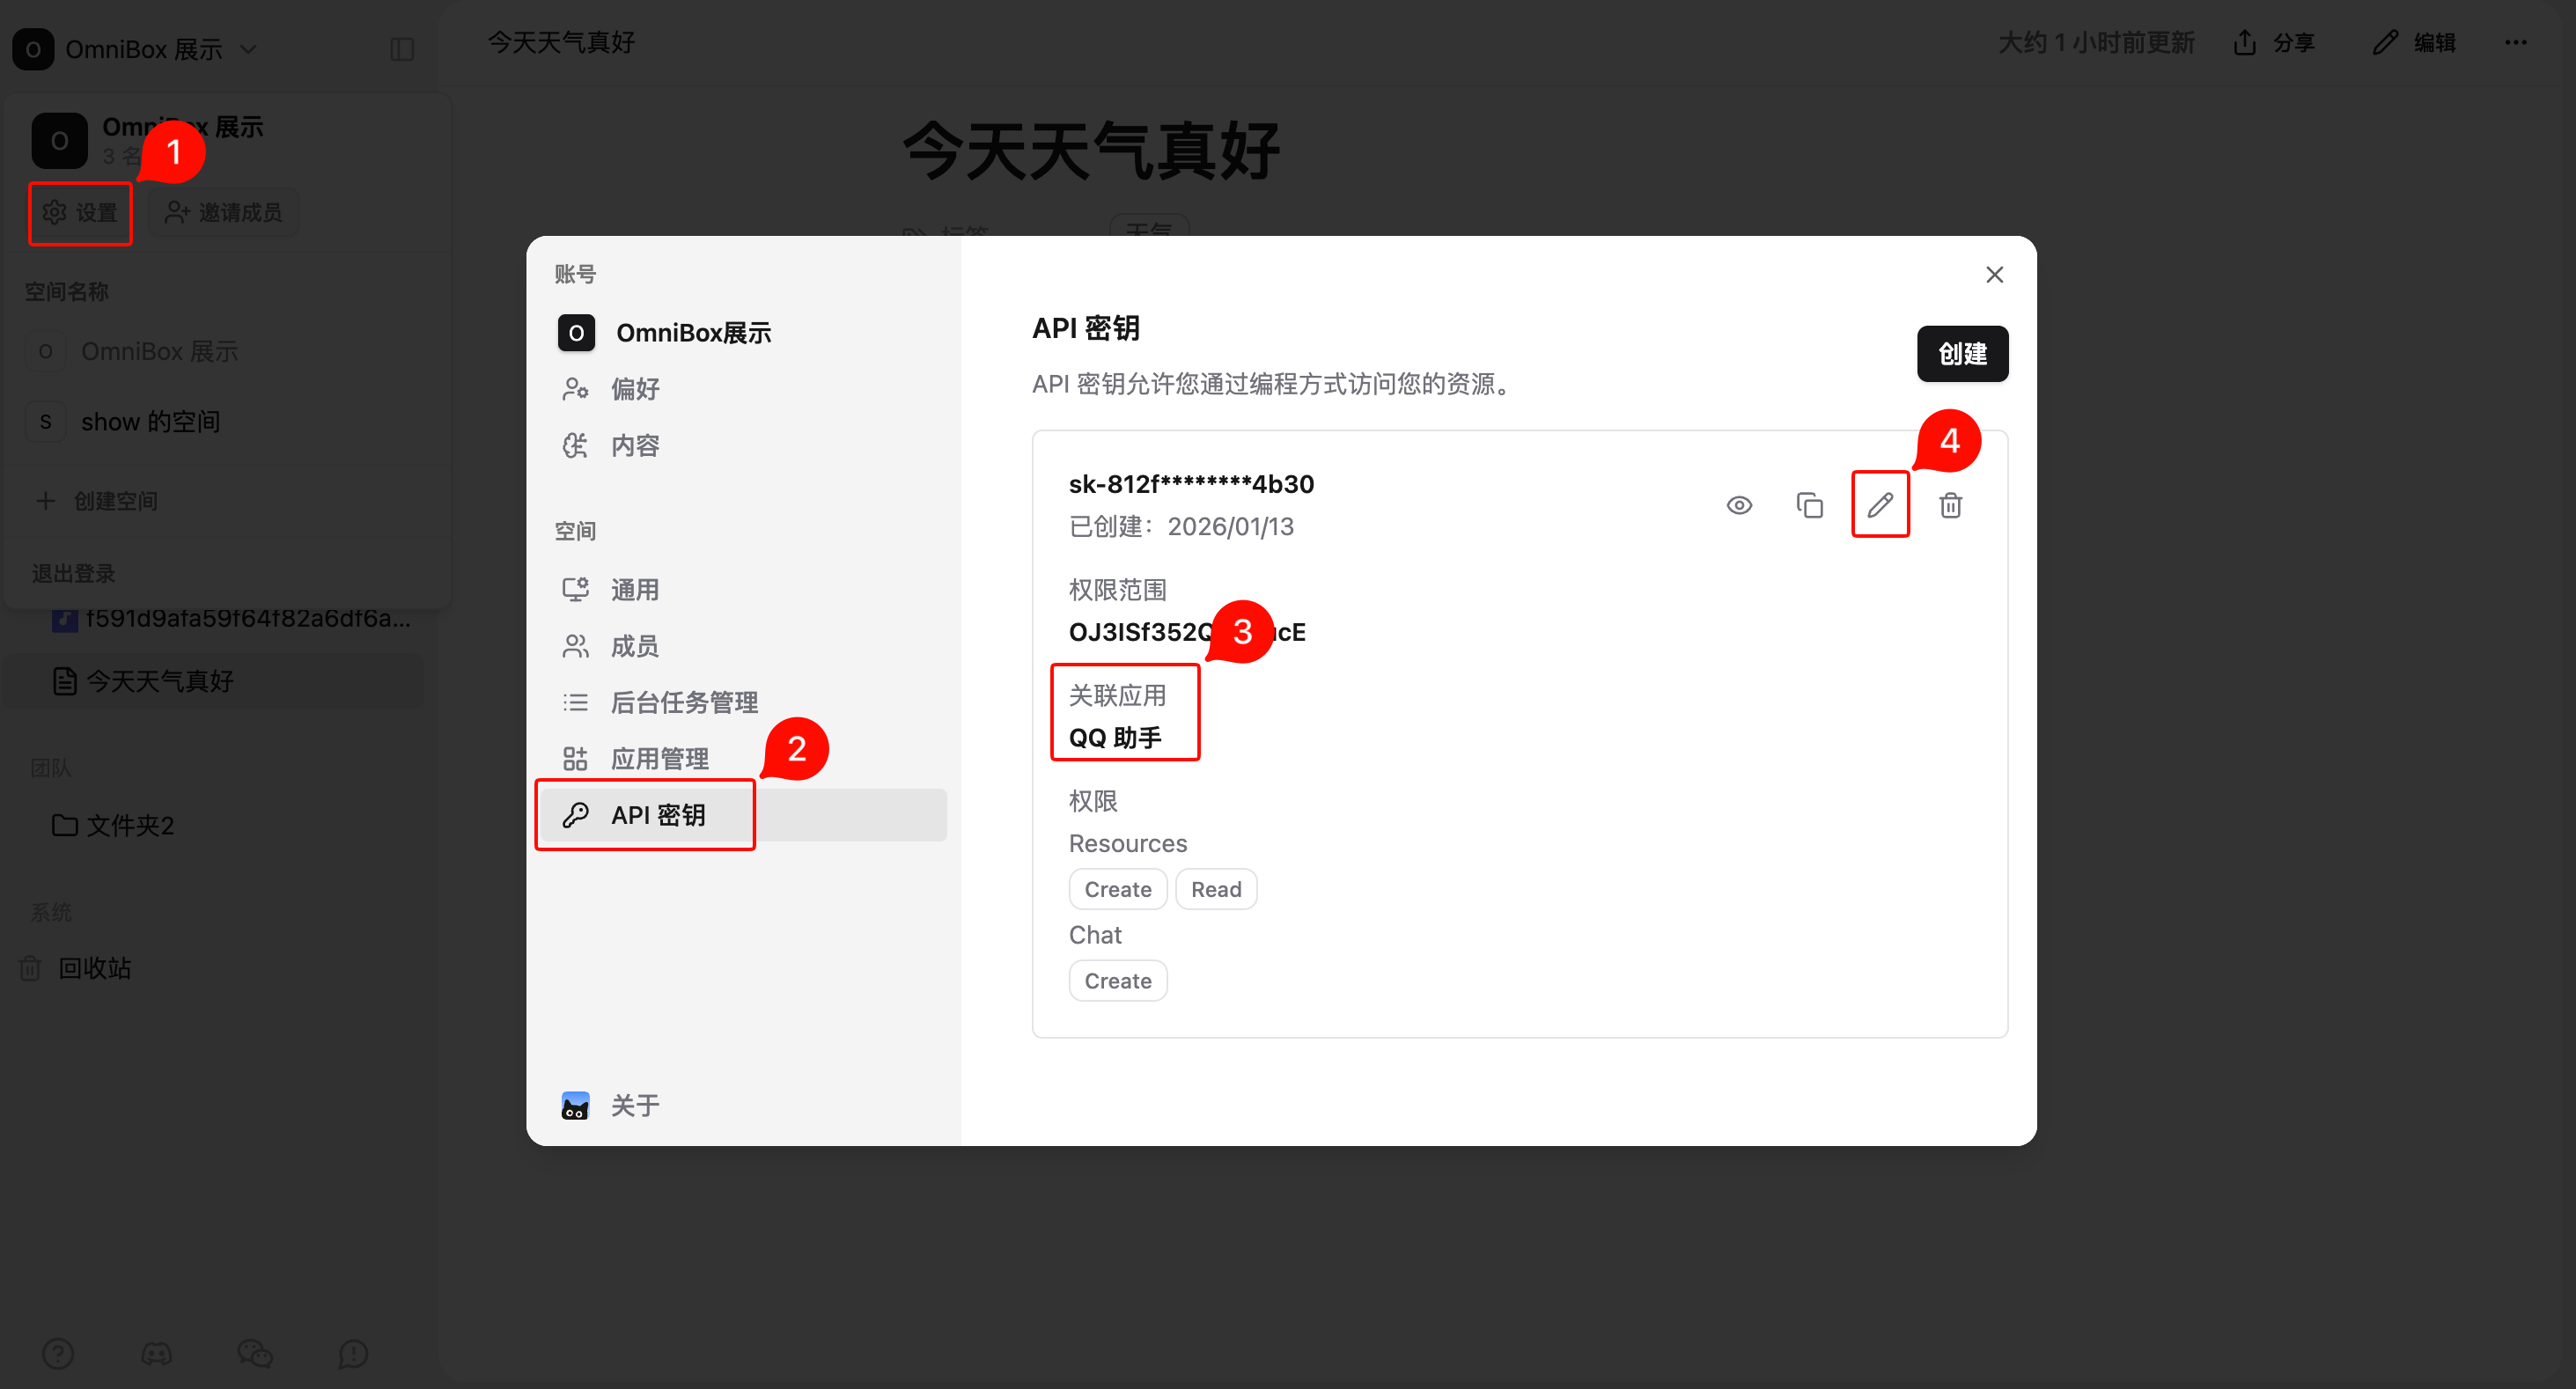
- Open
Settings - Select
API Keys - Find the API key associated with QQ Assistant
- Click
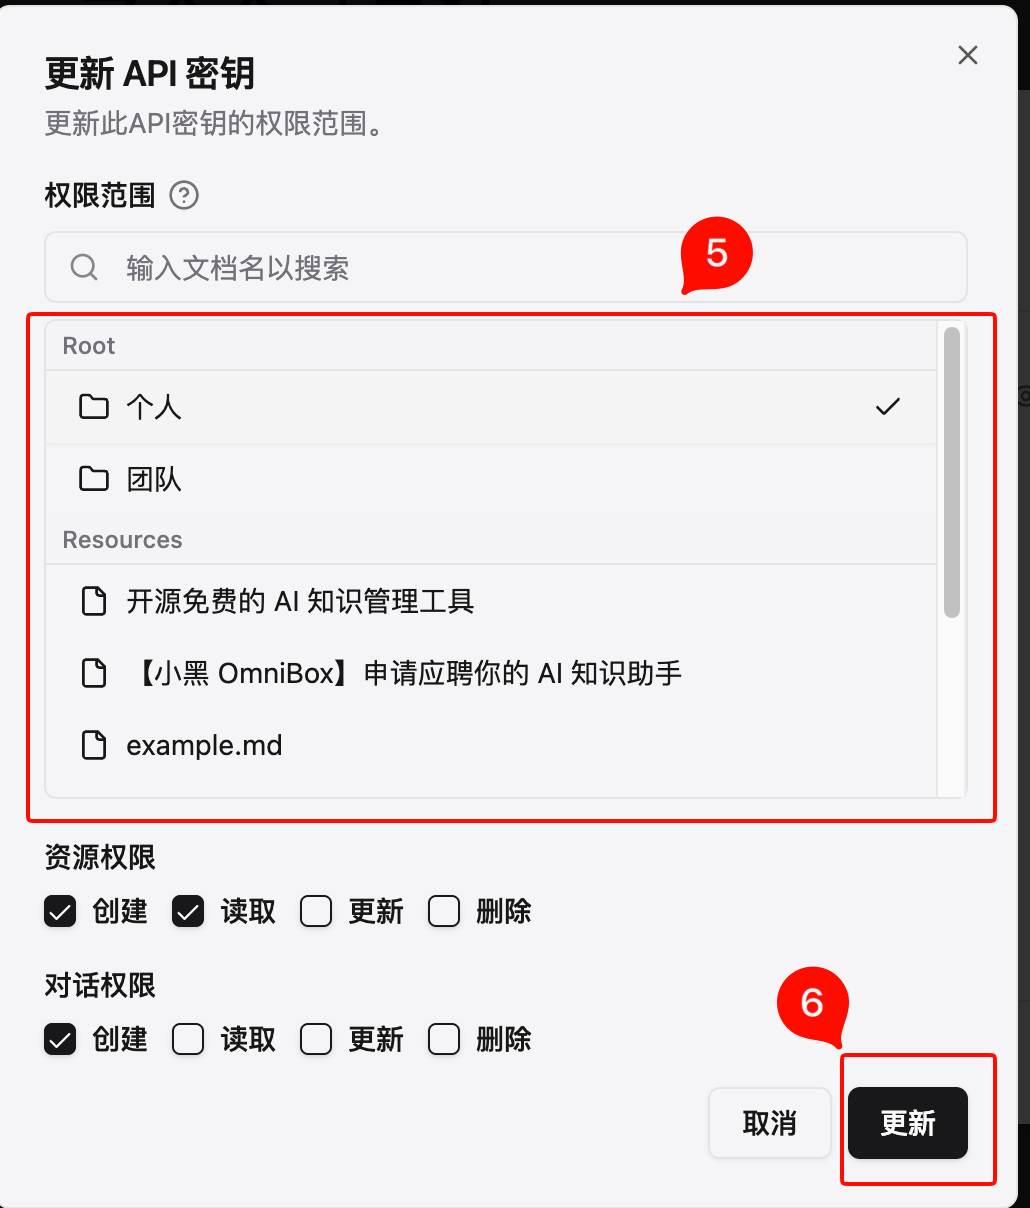
Edit - Select save location
- Click
Update
Add Tags When Saving Text
When sending text to QQ Assistant, you can add #tagcontent at the end to manually add tags, for example: The weather is nice today#weather.

Interaction and Commands
QQ Assistant supports two types of interactions:
- Quick Actions: Click to send immediately
- Commands: Type
/to bring up the command menu, then click a specific command to continue entering the content you want to save or ask about
Demo
- Send content in QQ
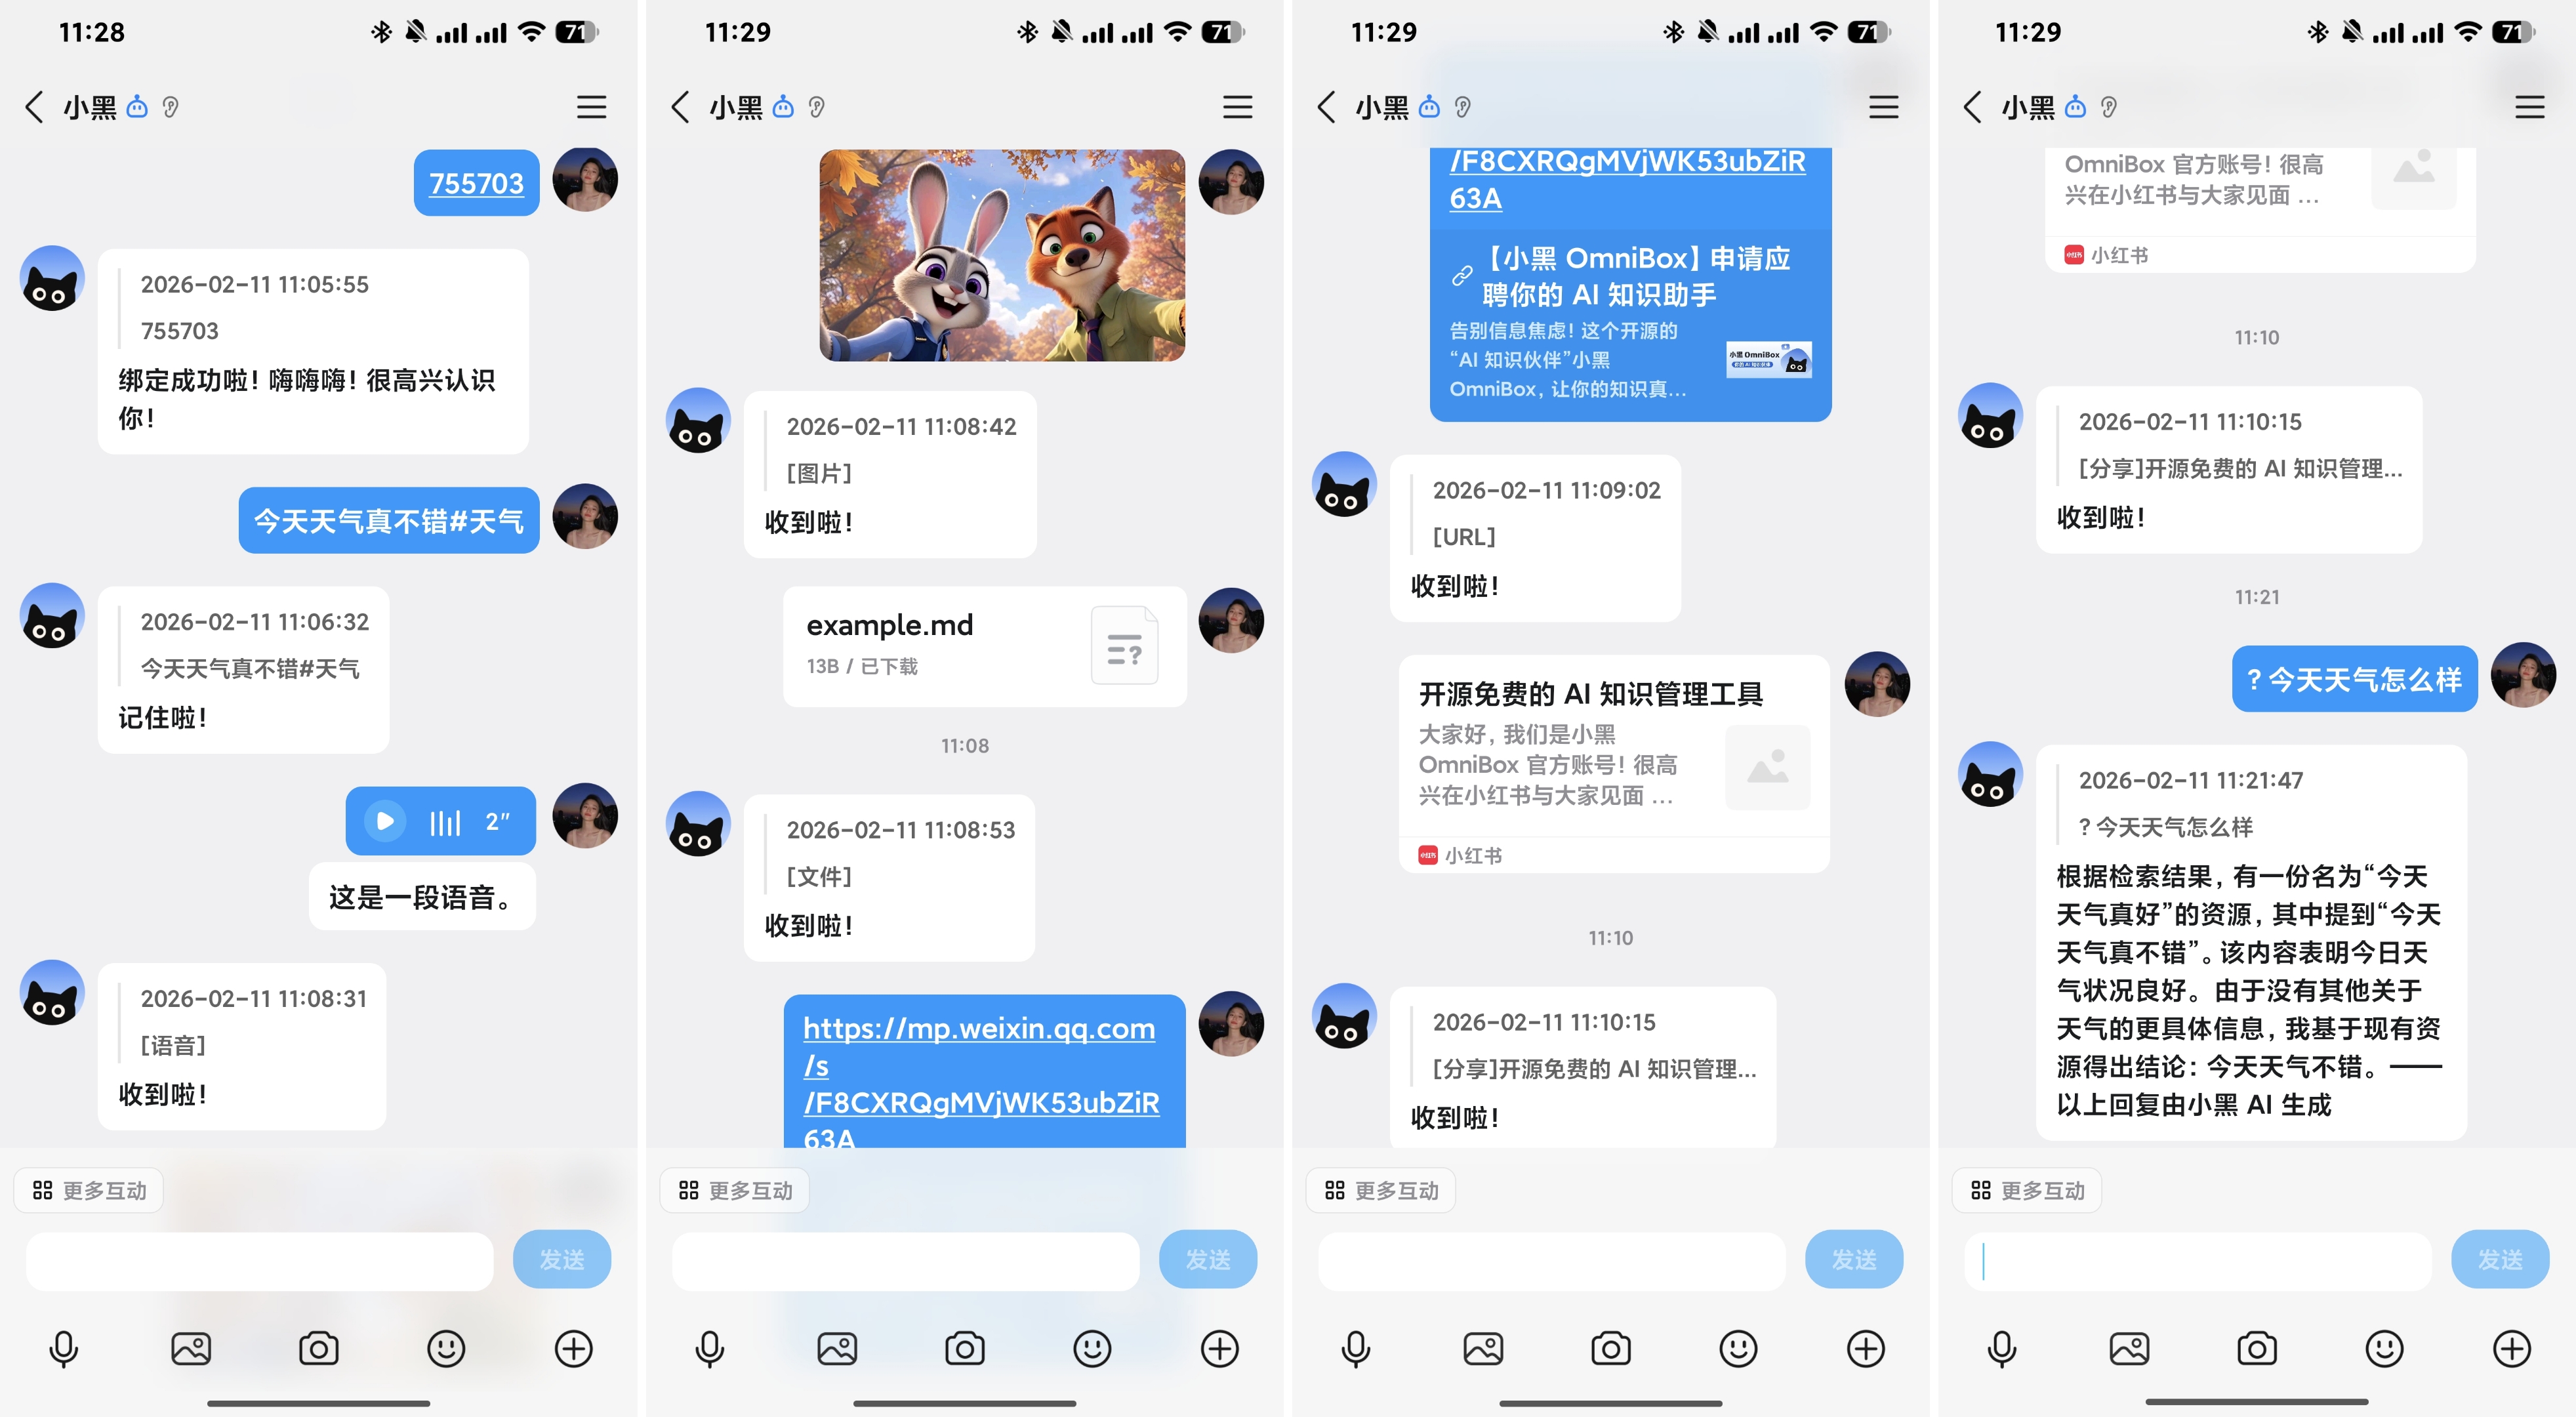
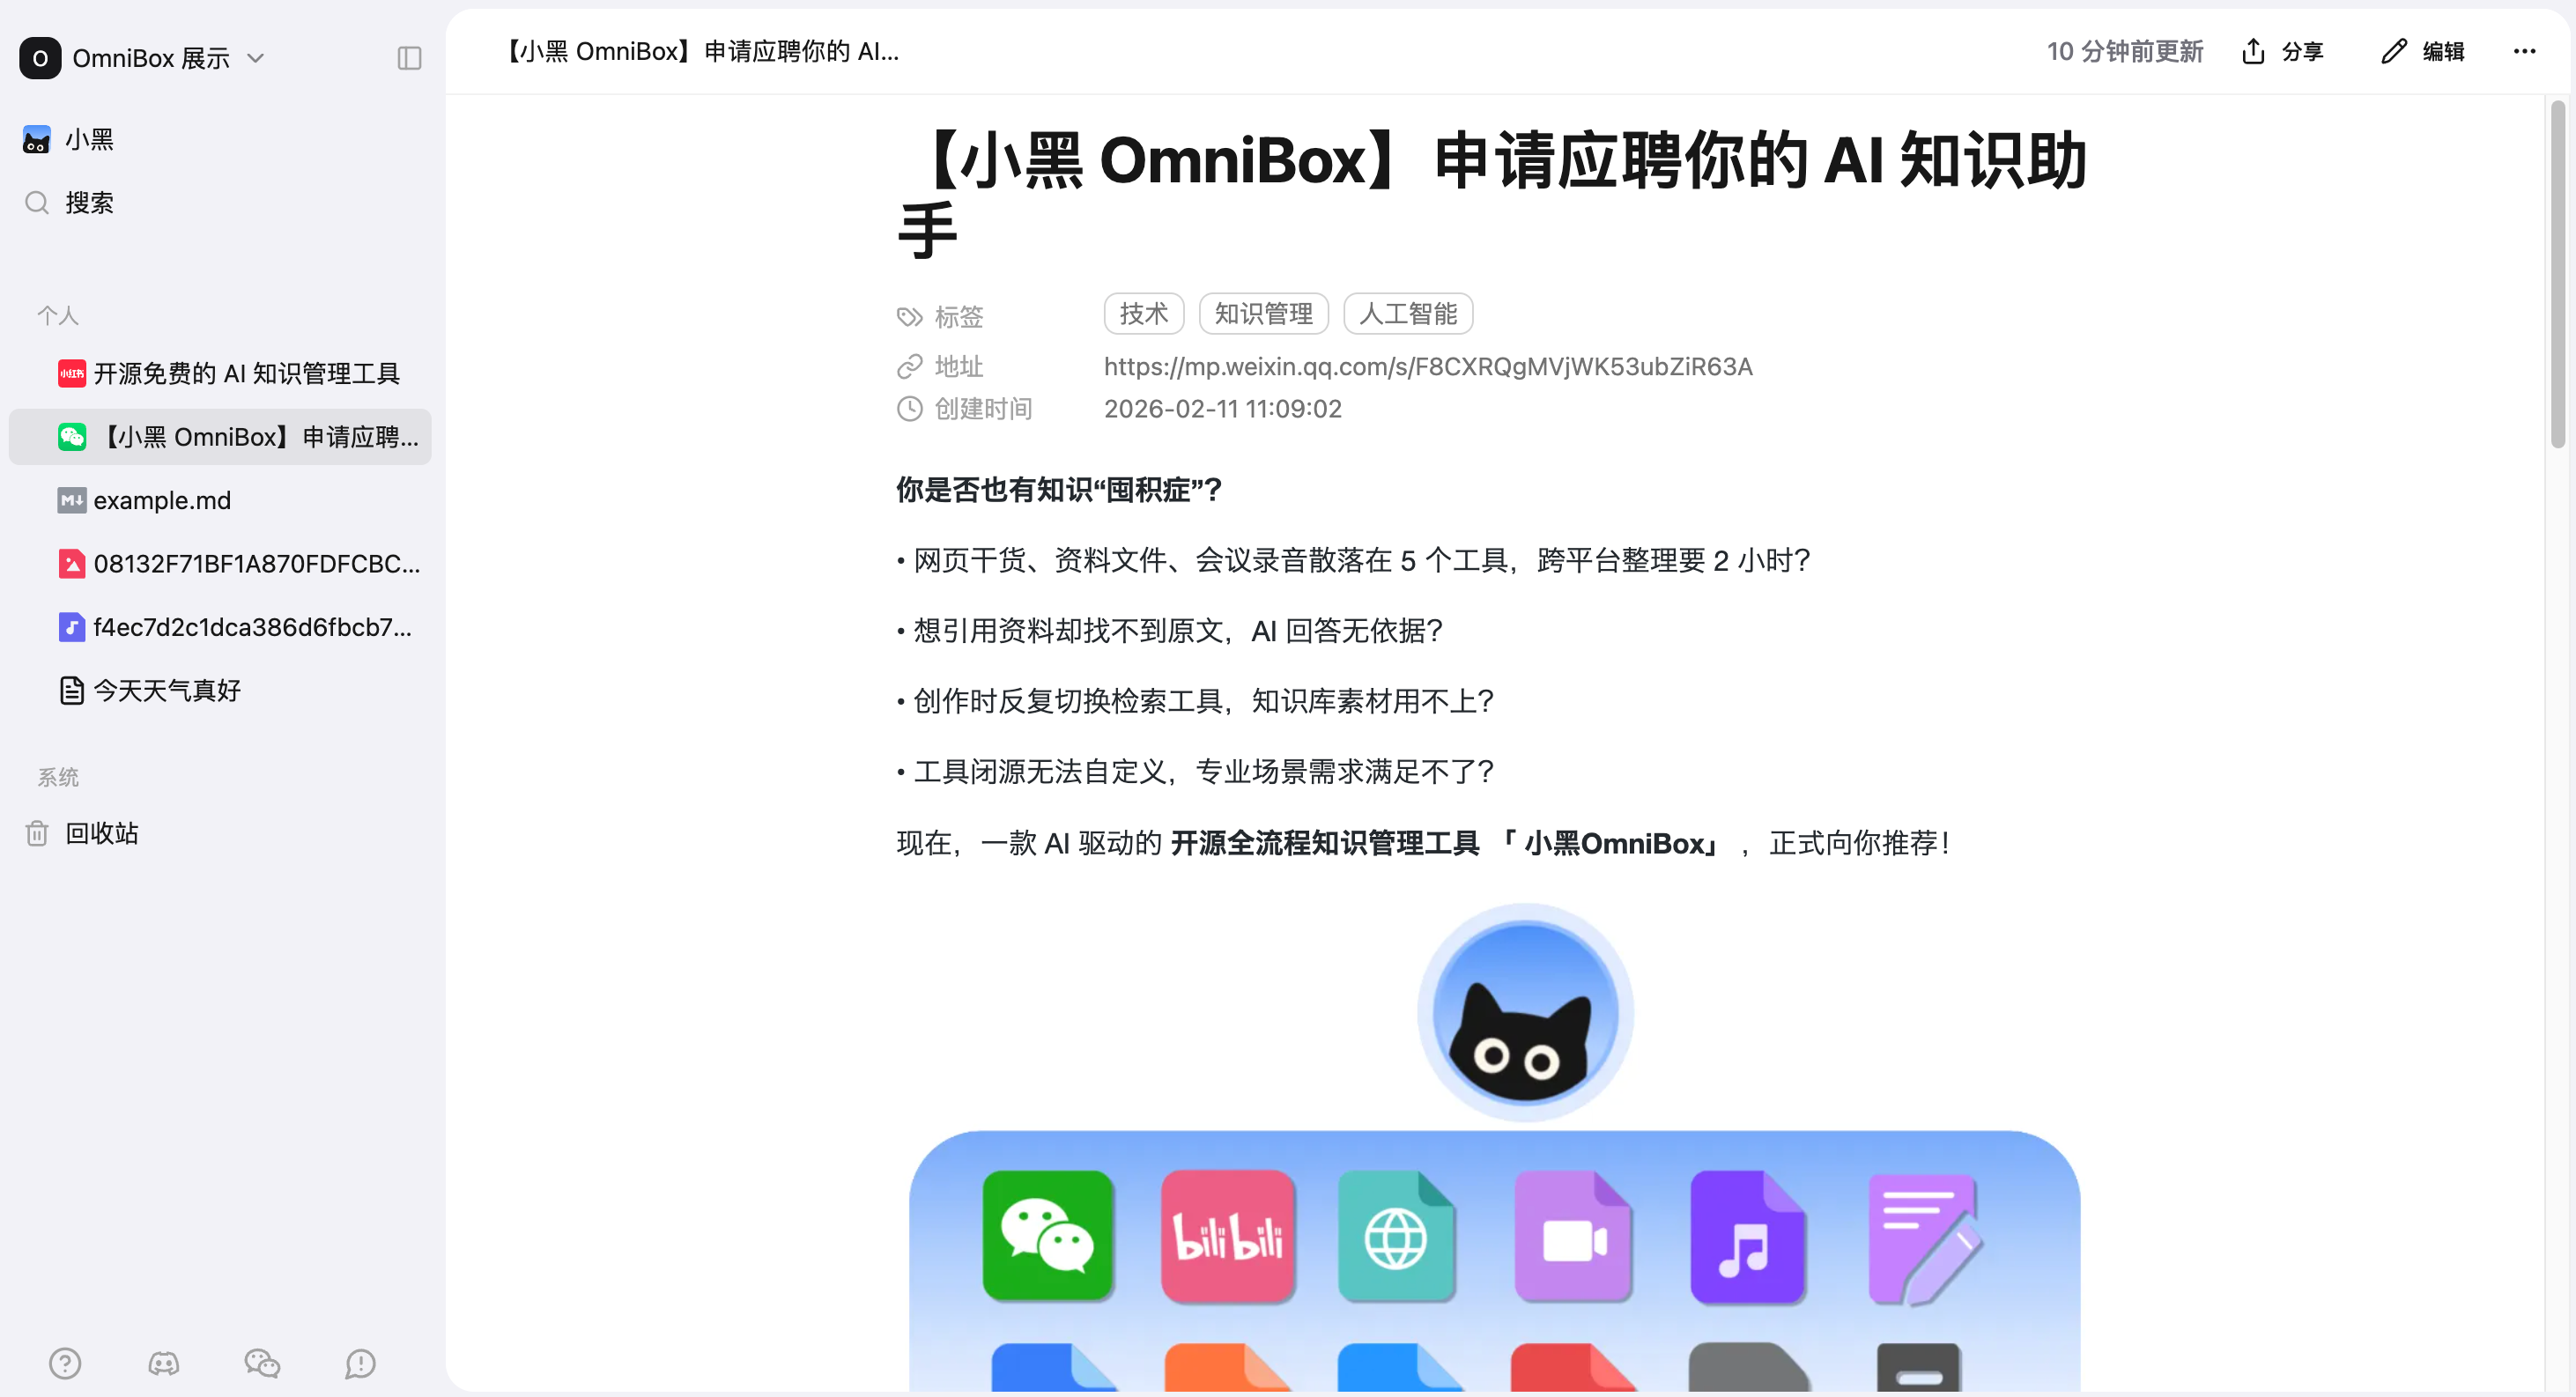
- Parsing result in OmniBox after sending:
FAQ
If you encounter issues with binding or saving, please contact us for help
Why did the binding fail after entering the verification code?
The possible reason is that your QQ is already bound to another namespace. You need to unbind from the original namespace before binding to the new one.
Can QQ Assistant be added to group chats?
Adding QQ Assistant to group chats for binding and replies is not currently supported.
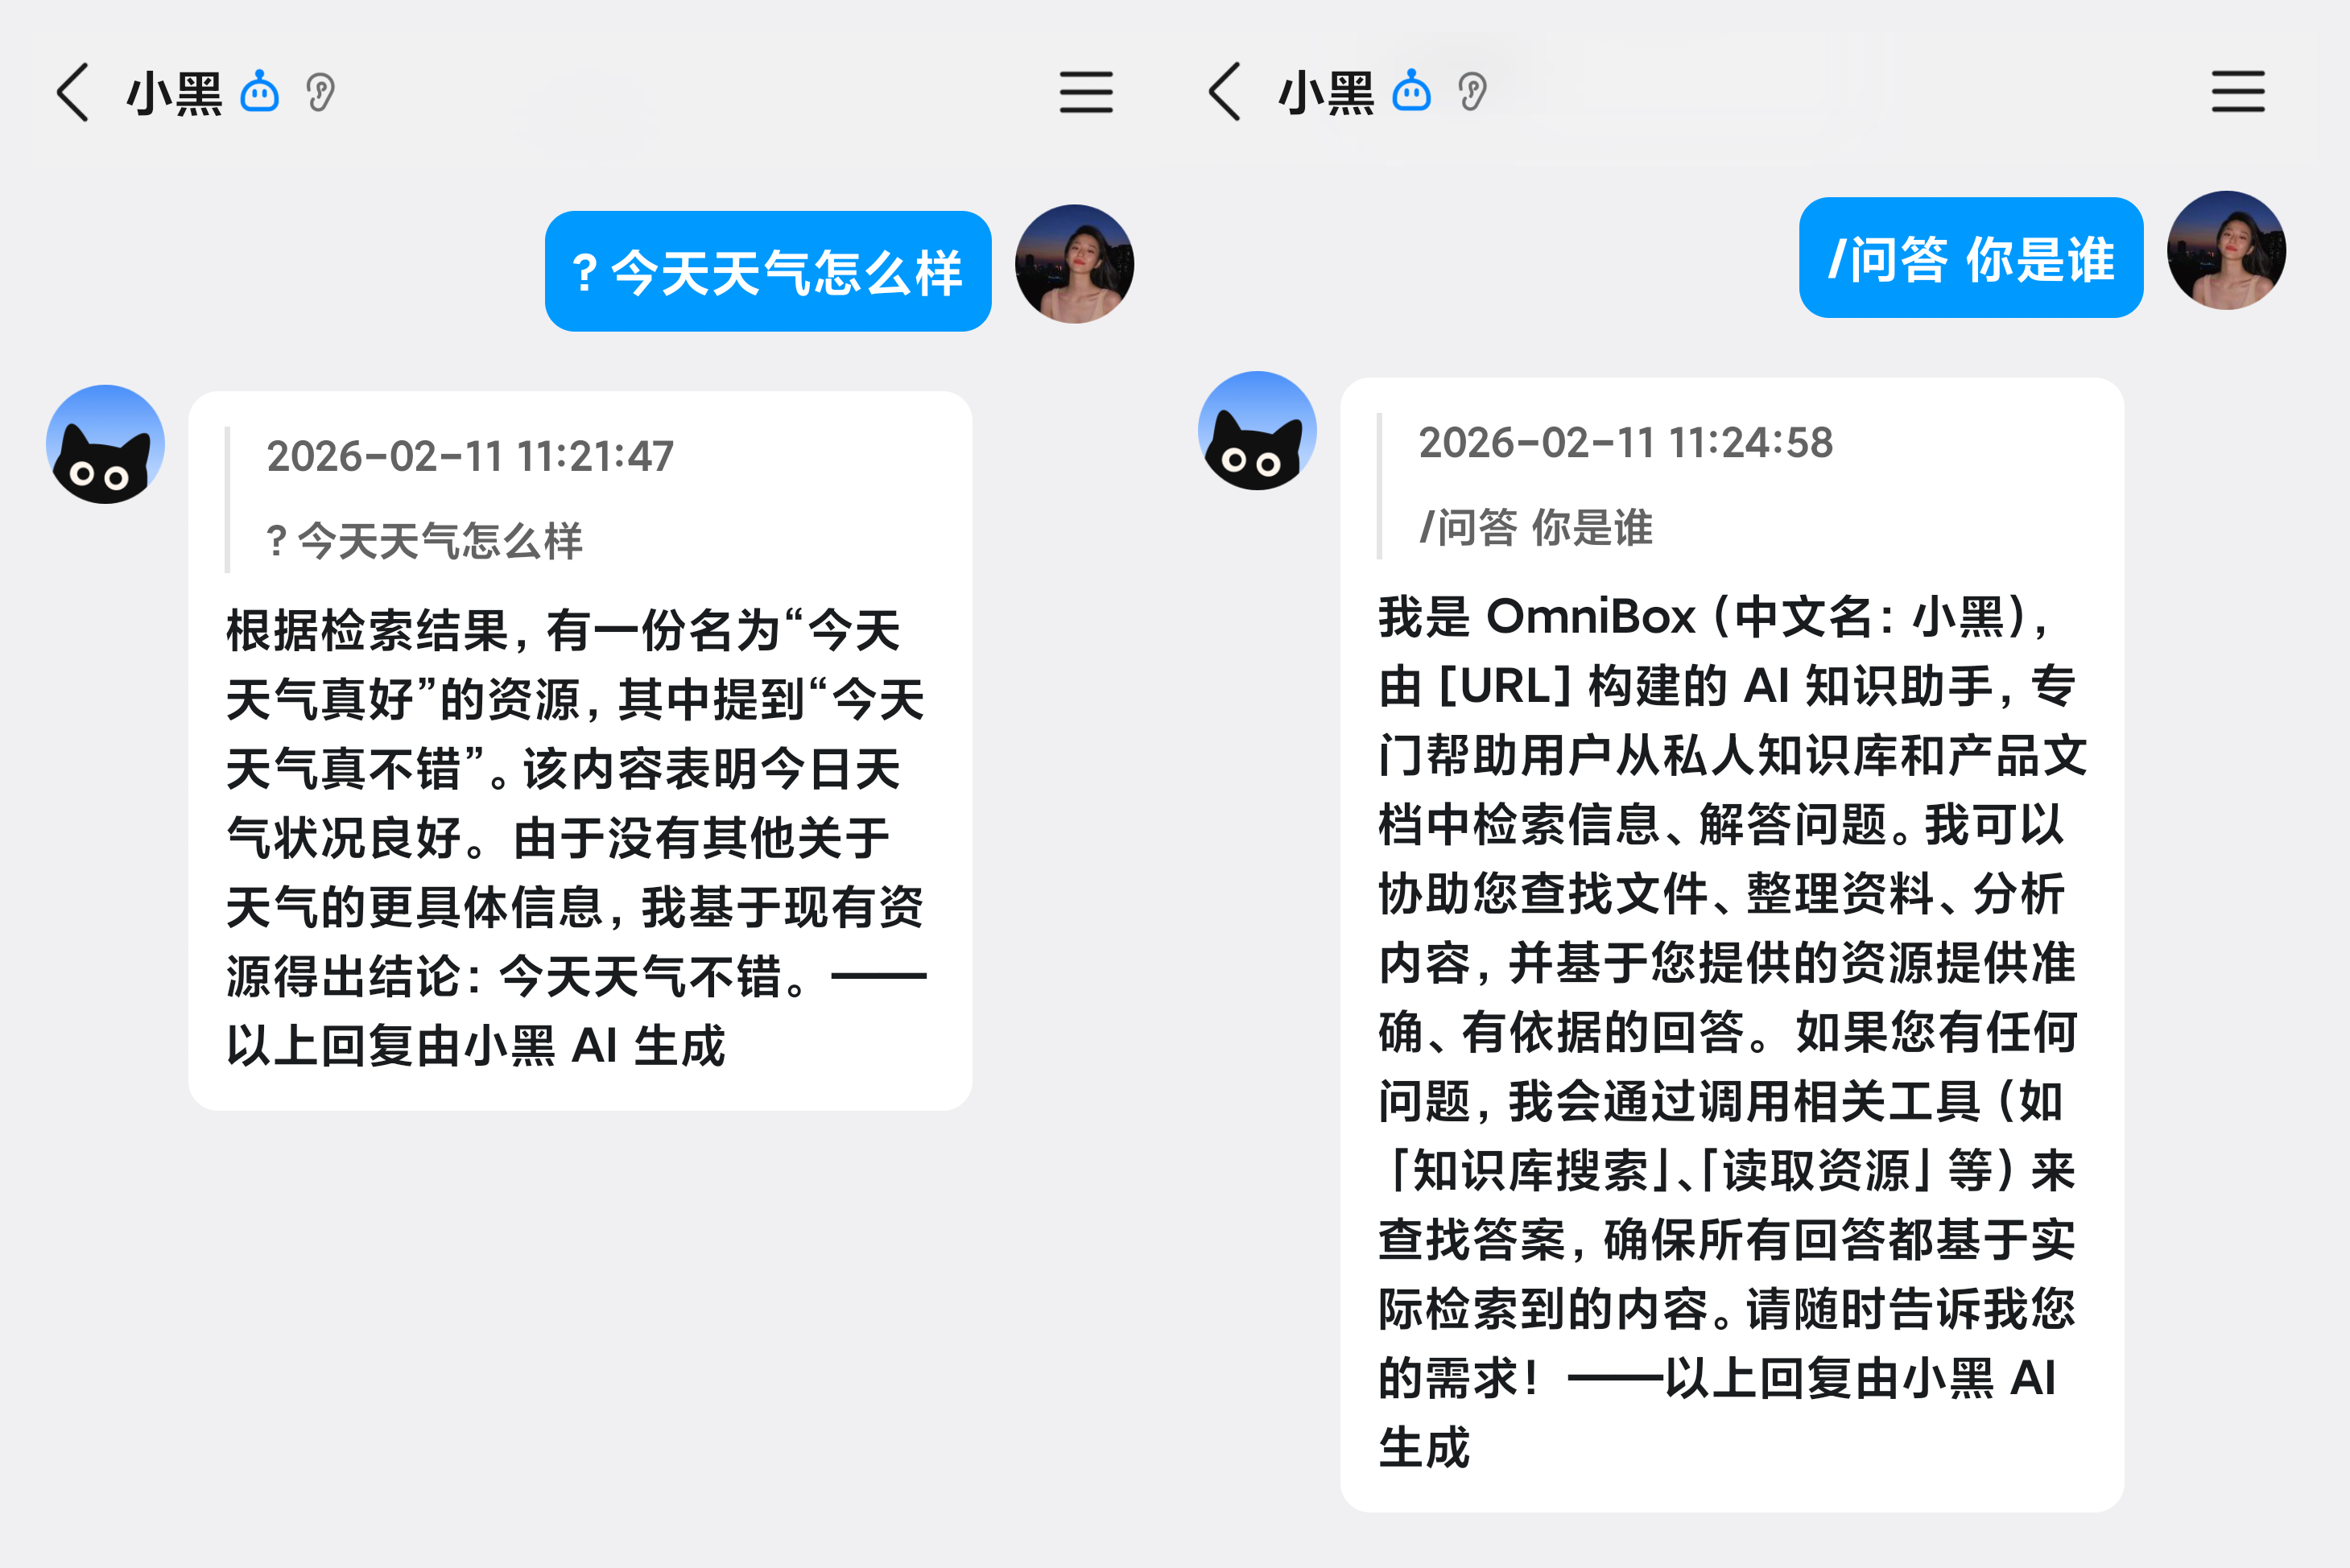
How to ask QQ Assistant questions?
By default, the system will automatically trigger Q&A or Save based on the content you send.
You can add a ? at the beginning (both Chinese and English work) to force trigger Q&A (e.g., "?Who are you")
Or type / and select /Q&A from the menu (e.g., "/Q&A Who are you")
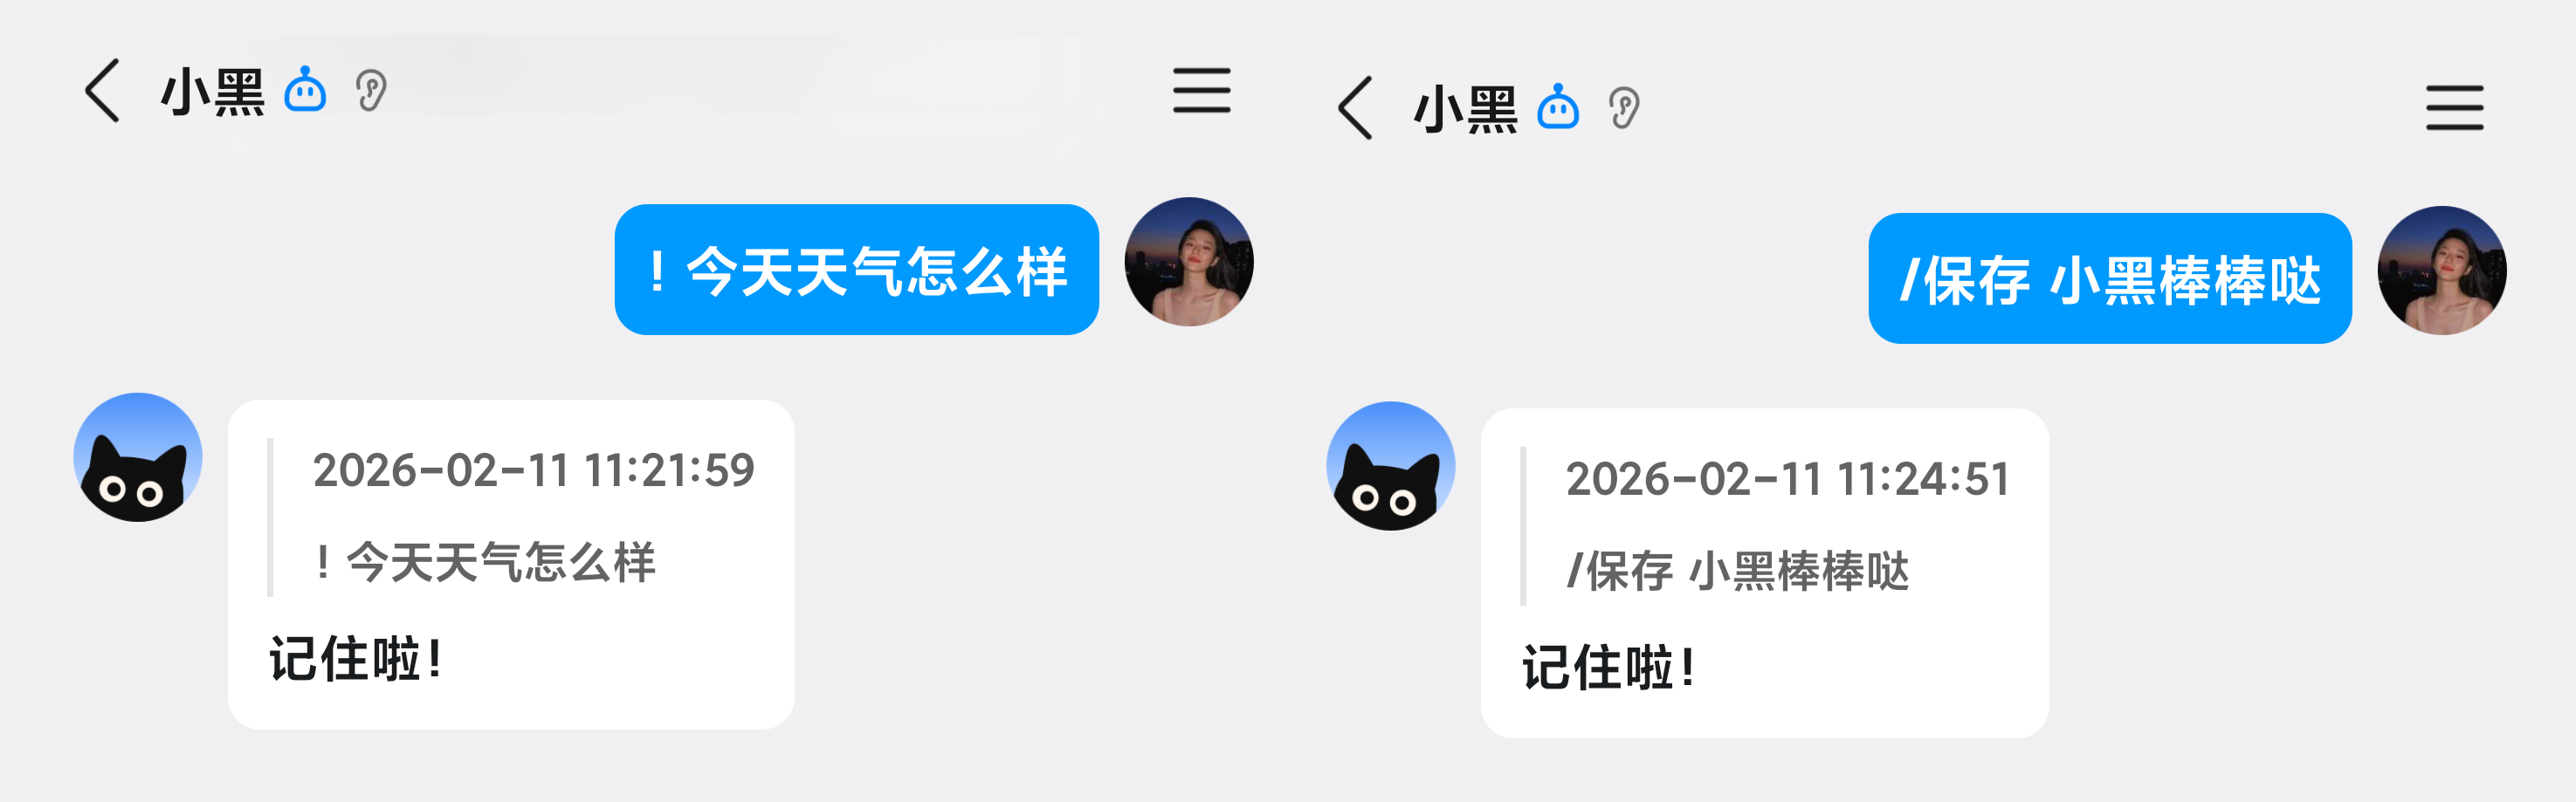
How to make QQ Assistant save text?
By default, the system will automatically trigger Q&A or Save based on the content you send.
You can add a ! at the beginning (both Chinese and English work) to force trigger Save (e.g., "!Who are you")
Or type / and select /Save from the menu (e.g., "/Save Who are you")
Can QQ Assistant bind to two QQ accounts?
- Not supported at this time
- A workaround is to register two accounts, join the same namespace, and have the assistant save to the team namespace
What is the [URL] in the reply content?
When a reply contains a website link, QQ may recognize it as risky information and block the message from being sent. Therefore, we apply a layer of substitution on the backend, replacing all URLs in the reply content with [URL].