
Batch Management
Batch management helps you work with multiple knowledge base resources at once. When you need to organize many files, adjust folder structure, or use several resources in one AI chat, you do not have to open and operate on each resource one by one.
Batch management is currently available in the left knowledge base tree on the web app. It supports multi-select operations for files, folders, and smart folders.
Entry Point
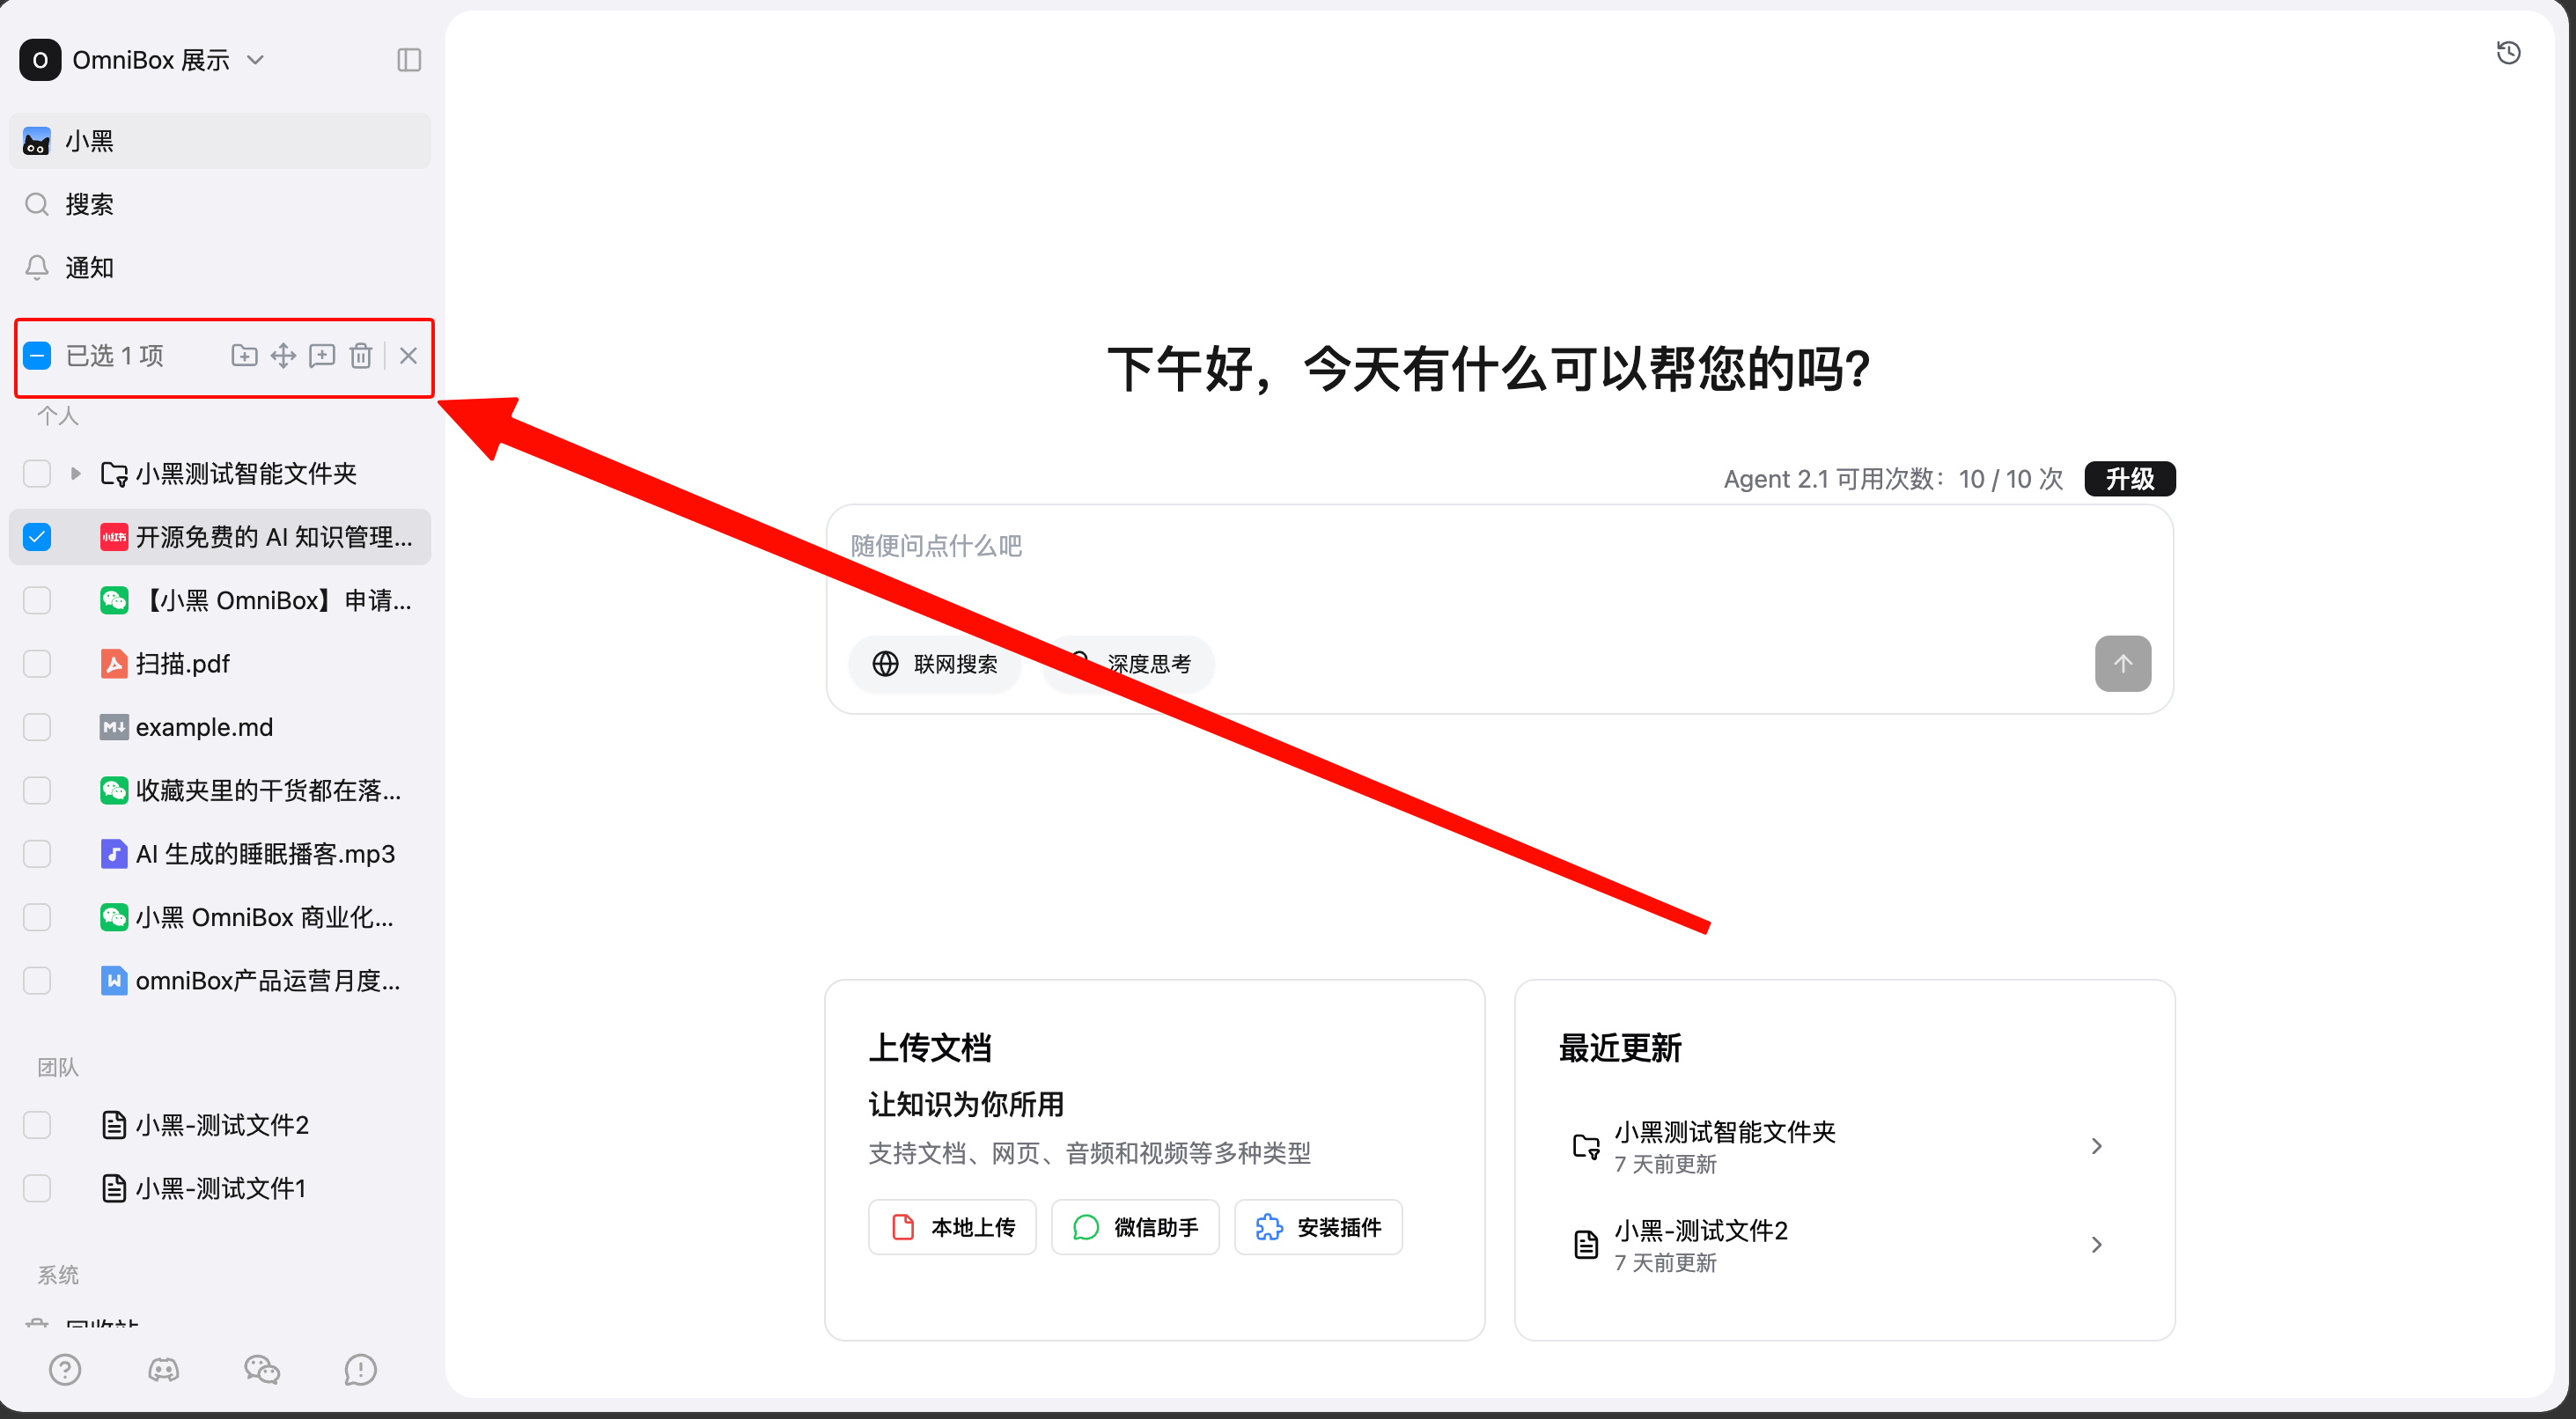
In the left knowledge base tree on the web app, click Multi-select at the top to enter batch management mode.
![]()
After entering multi-select mode, selectable resources show a checkbox on the left. The toolbar shows the number of selected resources and the available batch actions.
To exit batch management, click the exit button on the right side of the toolbar, or press Esc.
Select Resources
In multi-select mode, you can select resources in these ways:
- Select a single file or folder.
- Select a folder to operate on the whole folder, including resources inside it.
- Use the checkbox at the top to select all selectable resources in the current tree.
- Hold
Shiftand click another resource to select a visible range.
Child items shown inside a smart folder cannot be selected directly. To manage the original resources, go to the regular folder where those resources are stored.
What You Can Do
Create a Folder With Selected Resources
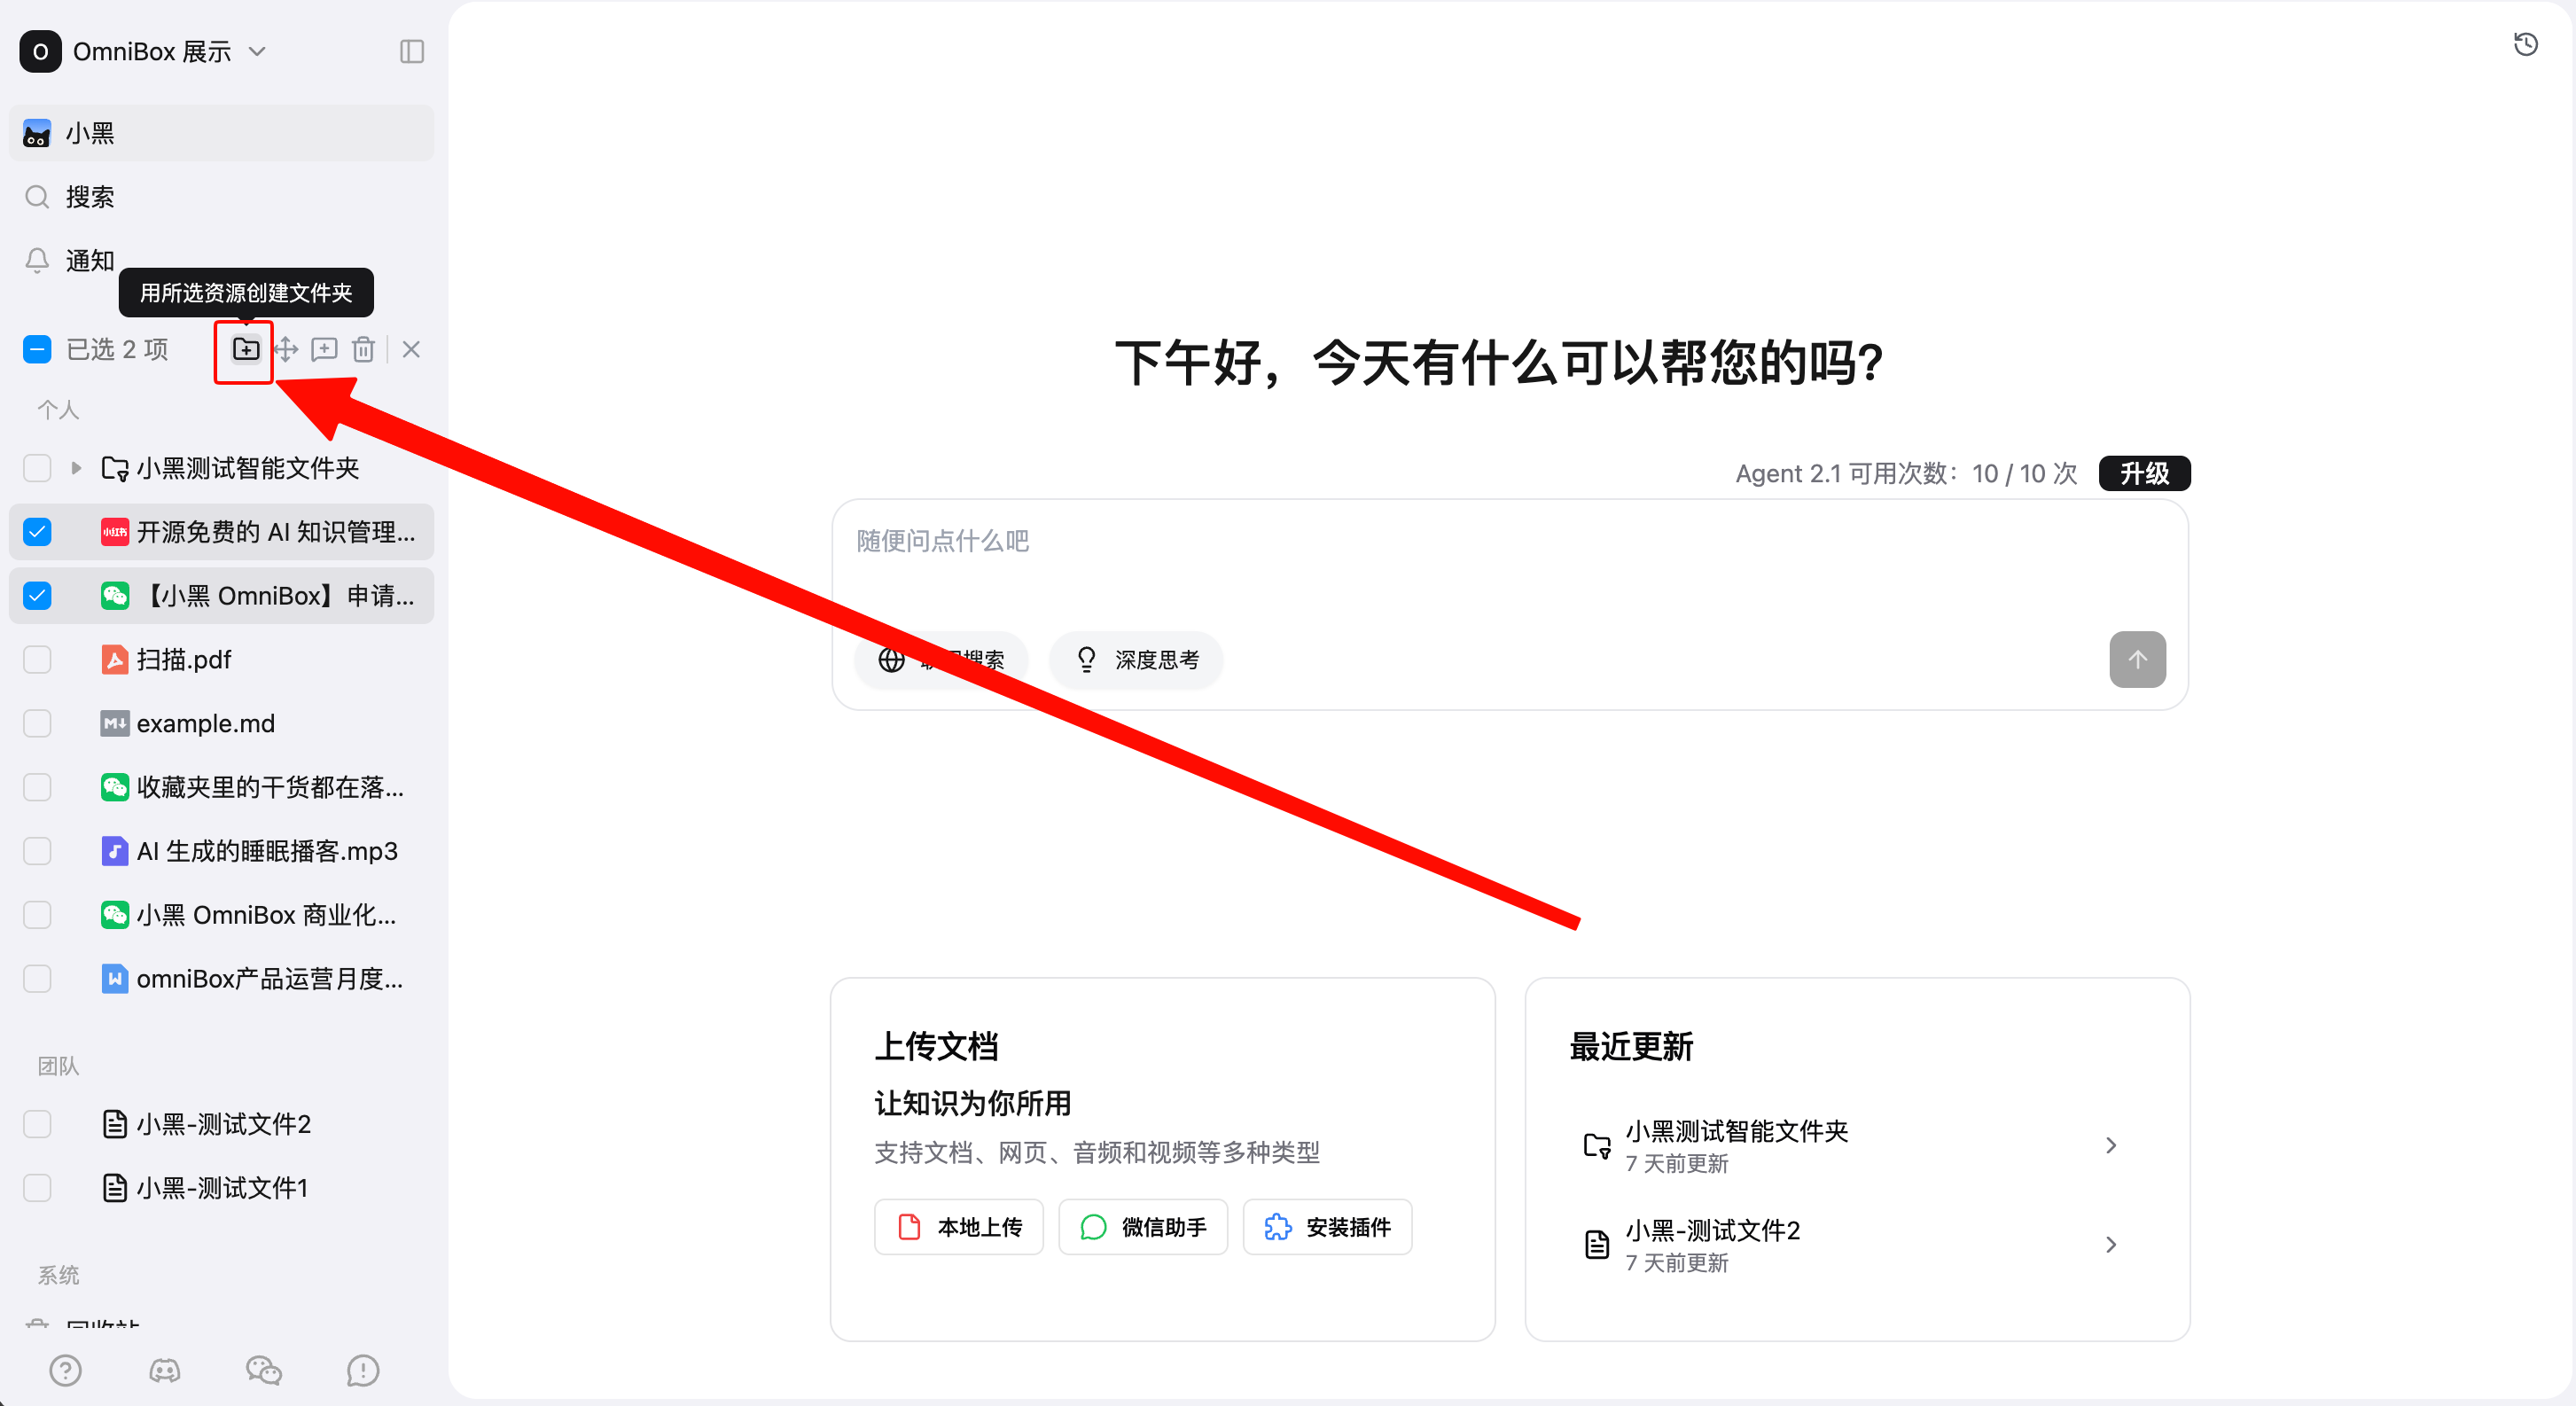
Click Create folder with selected resources, enter a folder name, and choose where to place the new folder.
After confirmation, OmniBox creates a new folder and moves the selected resources into it automatically.
This is useful when you want to:
- Gather scattered resources into one topic folder.
- Put several materials into one easy-to-find directory.
- Collect a batch of unsorted resources before organizing them further.
Please note:
- The folder name can contain up to 128 characters.
- If a resource with the same name already exists in the target location, creation will fail.
- Smart folders do not support this action.
Move Resources in Batch
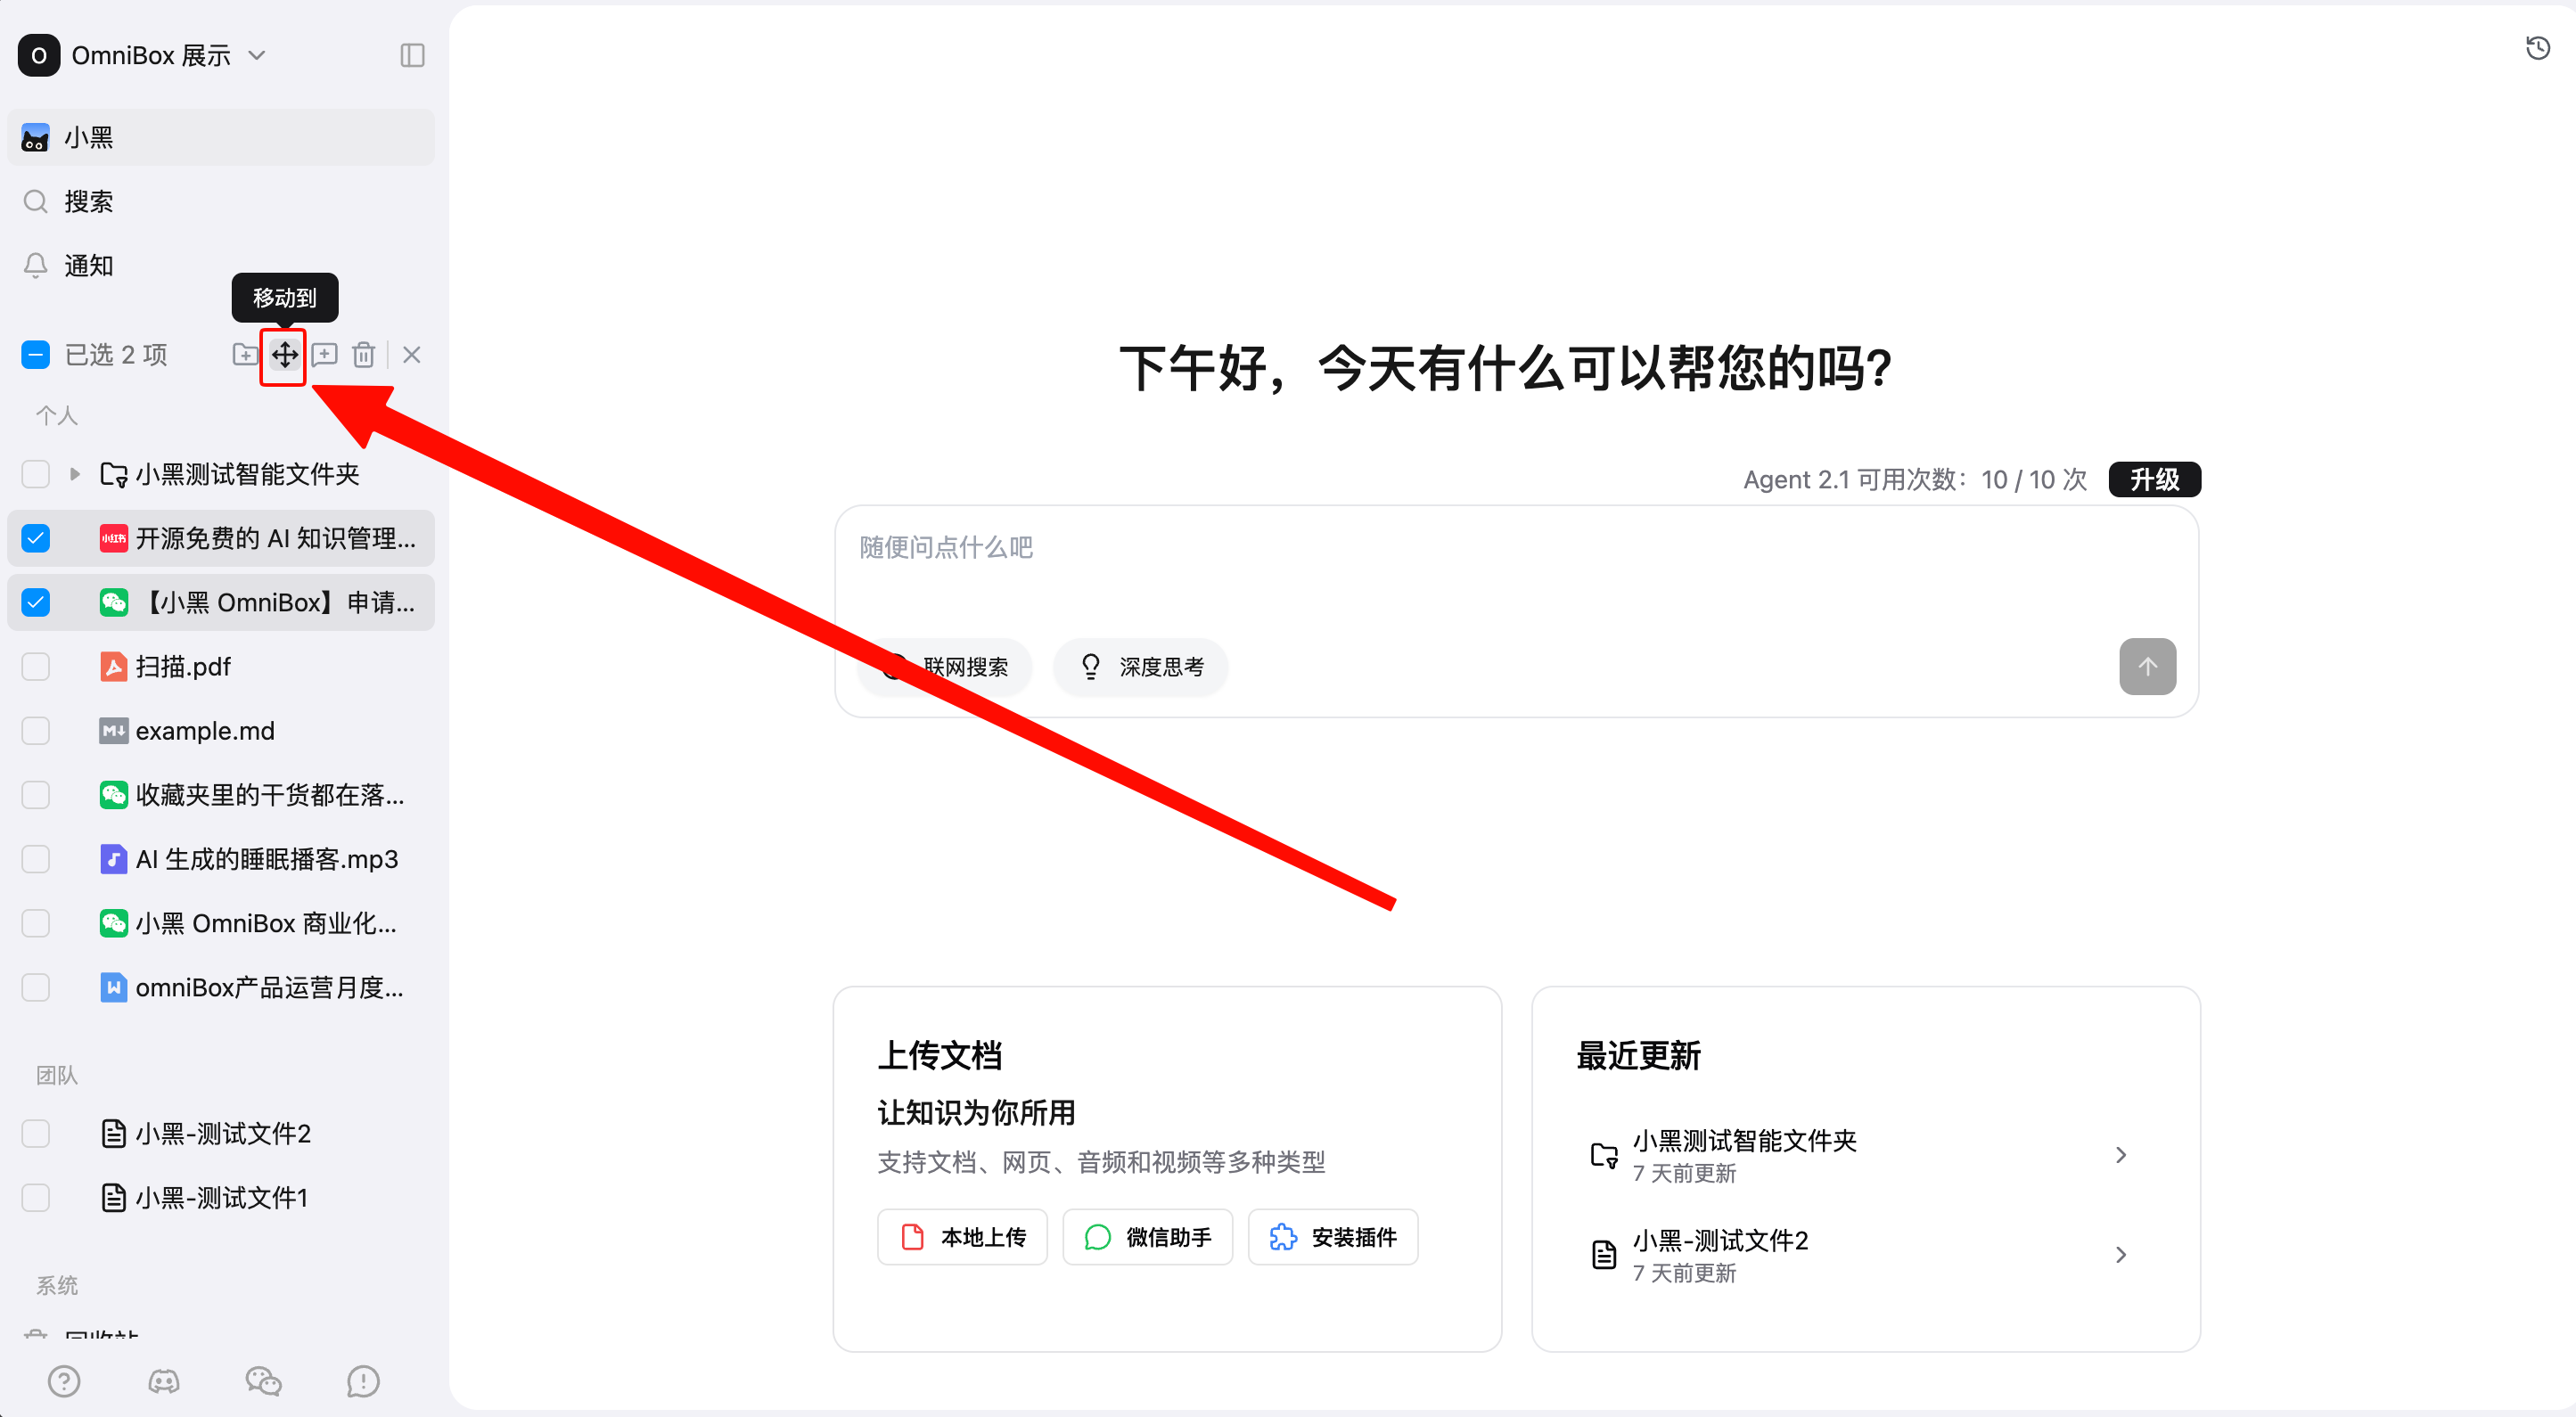
Click Move to, choose a target location, and OmniBox will ask you to confirm the number of resources and the target location.
After confirmation, the selected resources are moved to the target location. You can also drag the selected resources directly to a target folder.
Keep these rules in mind:
- You cannot move a resource into itself or into one of its child resources.
- If the target location is view-only, resources cannot be moved there.
- If the target location already has a resource with the same name, that resource will not be moved.
- Smart folders do not support batch move.
Add Selected Resources to Chat
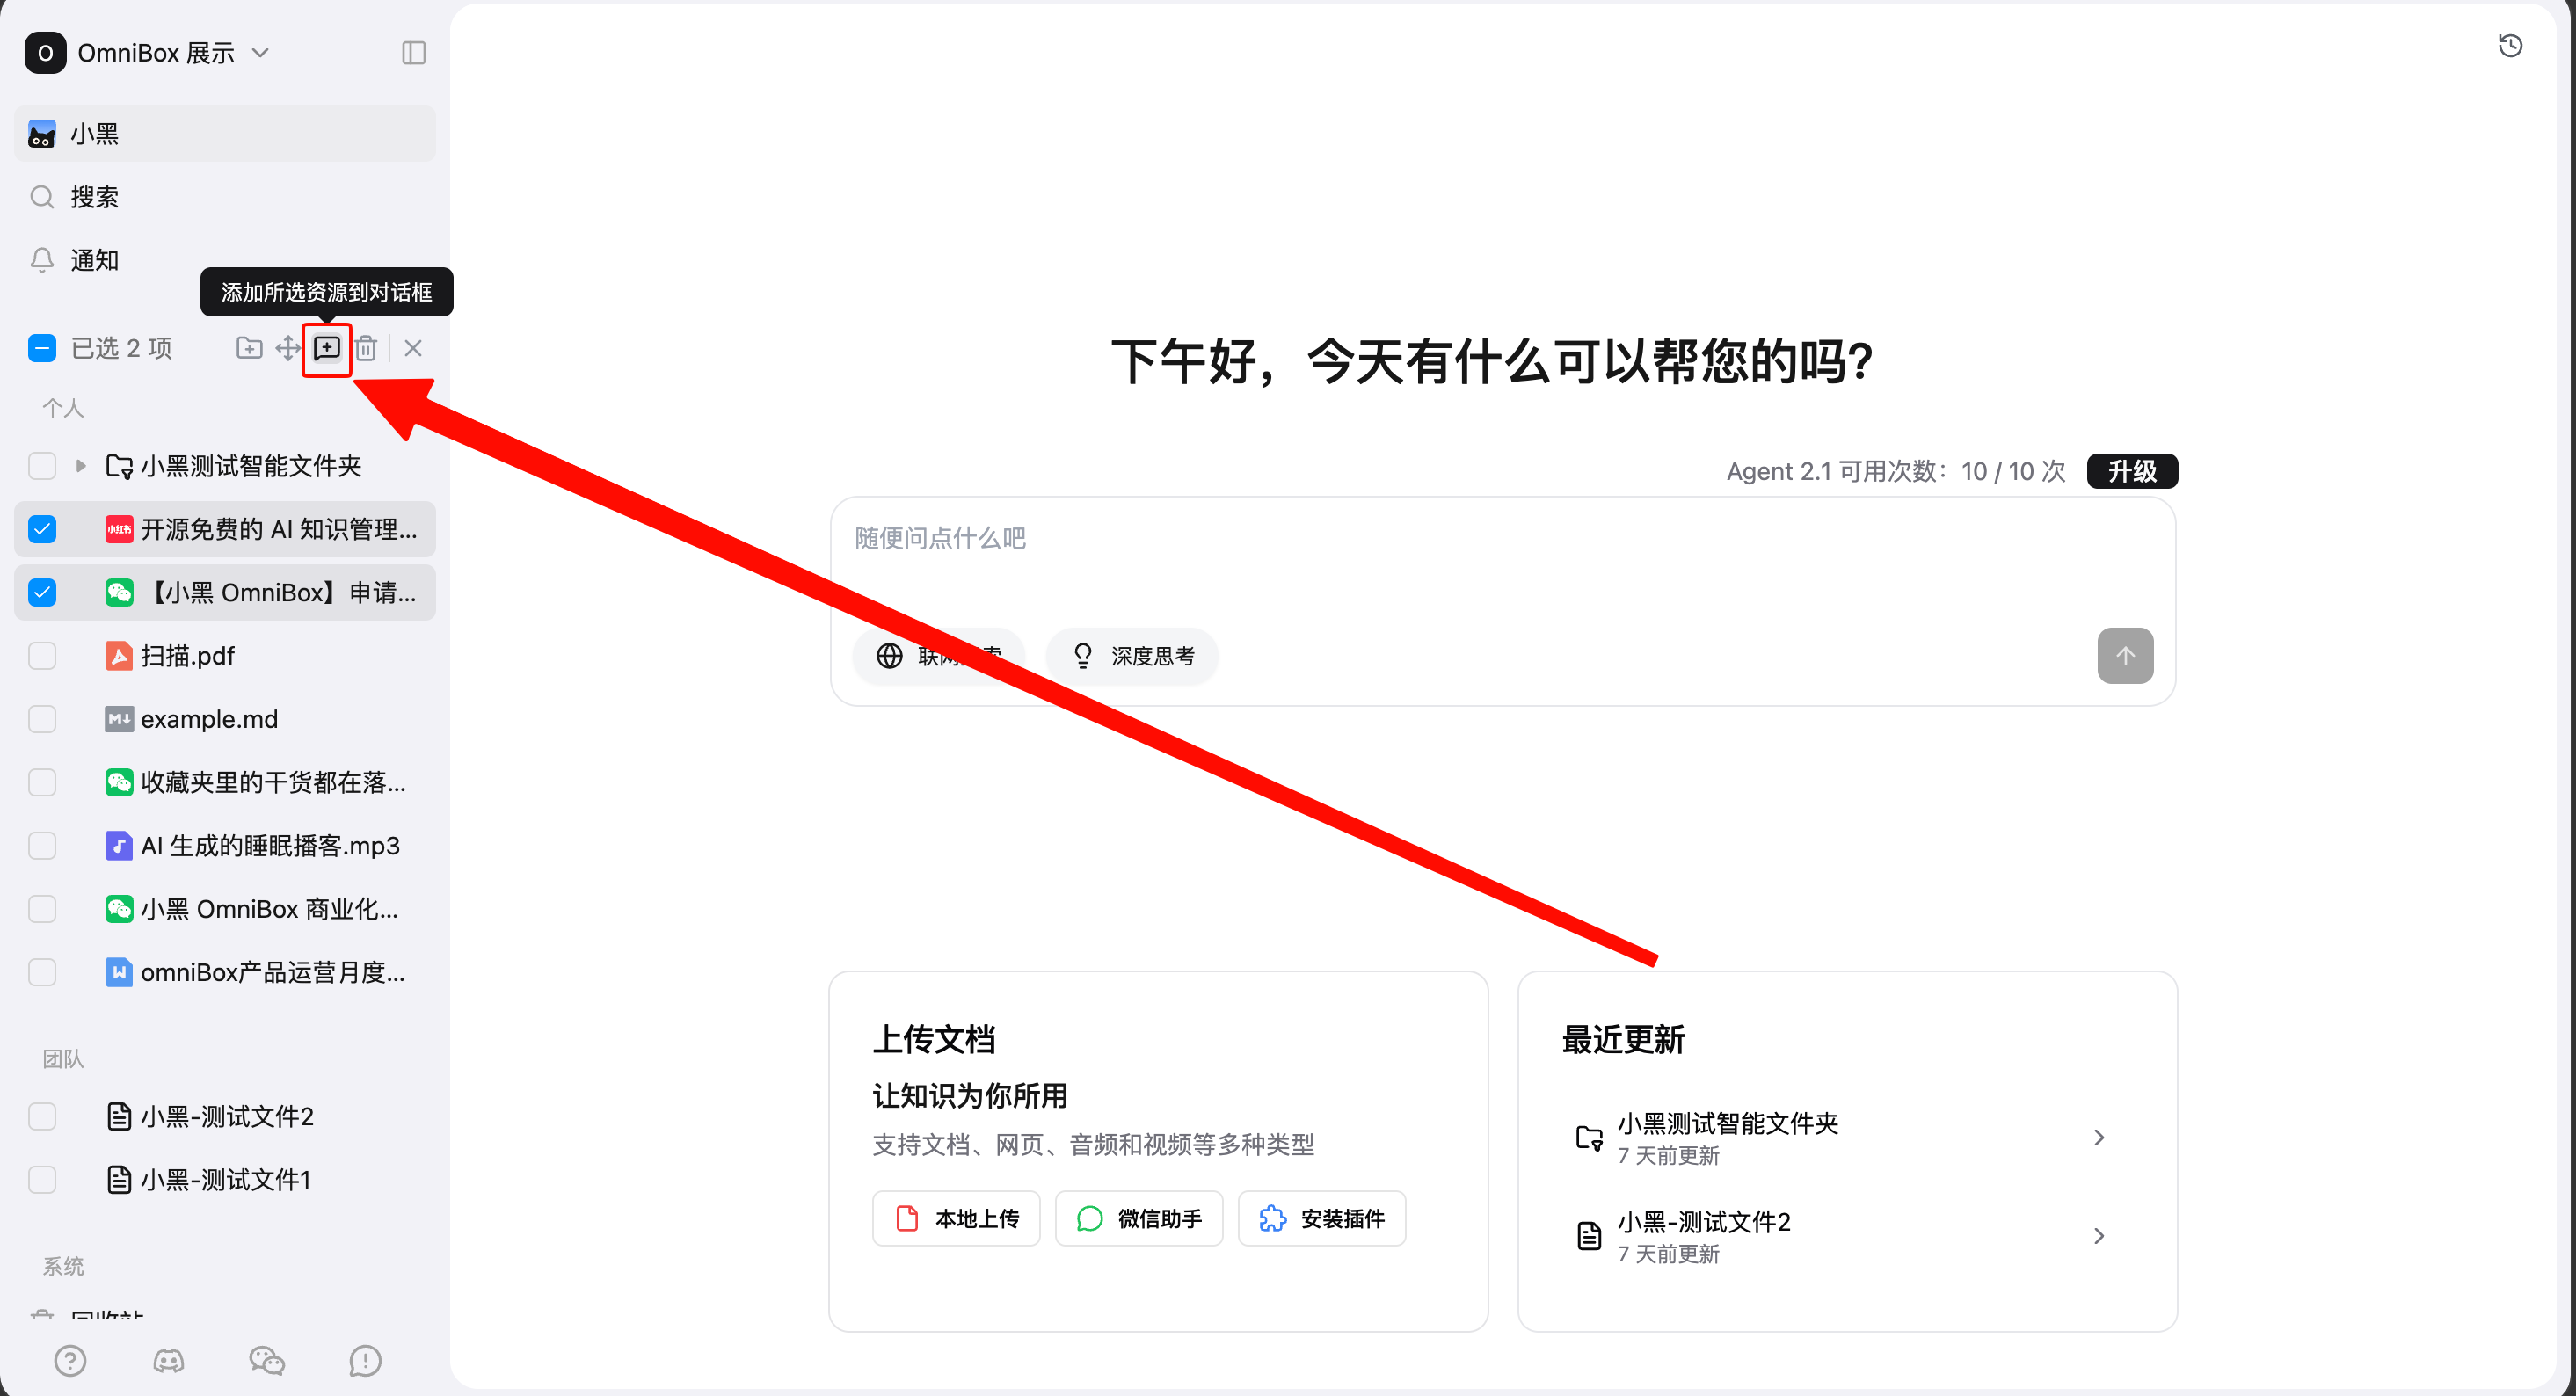
Click Add selected resources to chat to add the selected resources to the AI chat context and open the chat page.
This is useful before asking questions such as:
- Select several meeting notes and ask AI to summarize them.
- Select a project folder and ask AI questions based on the project materials.
- Select several documents and ask AI to compare, extract, or draft from them.
Folders and smart folders can also be added to chat. When you add a folder, AI uses that folder as context for the conversation.
Move to Trash in Batch

Click Move to trash, then confirm to move the selected resources to trash.
If you selected a regular folder, resources inside that folder are moved to trash together.
If you selected a smart folder, moving it to trash only removes the smart folder entry. It does not affect the original resources shown inside the smart folder.
Resources moved to trash can be restored from trash. After the retention period, they are deleted automatically.
Permissions and Failed Items
Batch management follows your permissions for the selected resources and target location.
- Resources you can operate on are processed normally.
- Resources you do not have permission to operate on are skipped.
- If none of the selected resources are authorized, the batch operation fails.
- If only some resources fail, OmniBox shows how many succeeded and how many failed.
Common failure reasons include:
- You do not have edit permission for selected resources.
- The target location is view-only.
- A resource with the same name already exists in the target location.
- The selection contains a smart folder for an action that does not support smart folders.
Common Actions
Organize Several Resources Into a New Folder
- Click
Multi-selectat the top of the left tree. - Select the resources you want to organize.
- Click
Create folder with selected resources. - Enter the folder name and choose where to place it.
- Click
Create.
Move Several Resources to an Existing Folder
- Enter
Multi-select. - Select the resources you want to move.
- Click
Move to, or drag the selected resources directly. - Choose the target location and confirm.
Start an AI Chat With Several Resources
- Enter
Multi-select. - Select the files, folders, or smart folders you want to use.
- Click
Add selected resources to chat. - Enter your question on the chat page for Q&A.
Clean Up Unneeded Resources in Batch
- Enter
Multi-select. - Select the resources you want to clean up.
- Click
Move to trash. - Confirm the action.
Tips
- Before moving resources or creating a folder in batch, check that the target location is correct.
- Deleting a smart folder does not delete the original resources shown inside it.
- If the tree does not update immediately after a batch operation, refresh the page or reopen the related folder.